Starting a '65 CA95 Restoration

The little brother to the CA160 in our family of Hondas
Sam Green
Posts: 701
Joined: Tue Jan 19, 2010 2:48 am

Post by Sam Green »

I have used stainless allen screws for years with no problems.
Just a smear of copper anti sieze compound/grease.

Sam. :)
Jetblackchemist
Posts: 463
Joined: Thu Apr 28, 2011 10:59 am

Post by Jetblackchemist »

If you don't get over zealous on tightening, stainless is fine as Sam the man says. Aluminum is softer than steel and can strip out the threads, if a Jethro gets ape on them. After a long time the two metals like to make an oxidized weld...that an impact driver makes short work of. Other than that there's nothing to be concerned about using steel.
ByTheLake
Posts: 730
Joined: Tue Oct 11, 2011 1:42 pm

Post by ByTheLake »

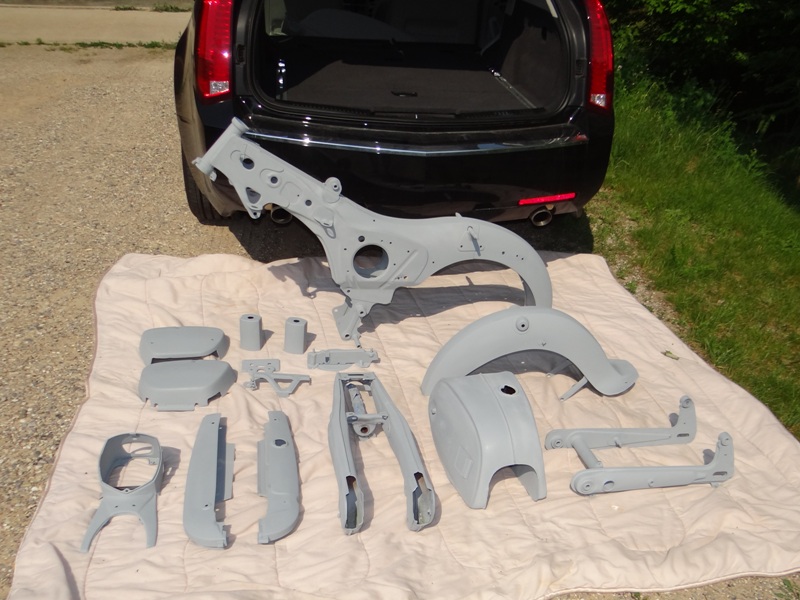
After a few months of scrubbing with steel wool, sand blasting, filling, sanding, priming, and repeating those steps, the parts are ready for the paint shop. My goal is to have the parts back in time for my one week vacation at the beginning of July, when I'd like to start reassembling the bike. That would give the paint shop 3 full weeks, which I’m hoping is sufficient. I’ll soon find out. I’ll bring the parts to the painter tomorrow.

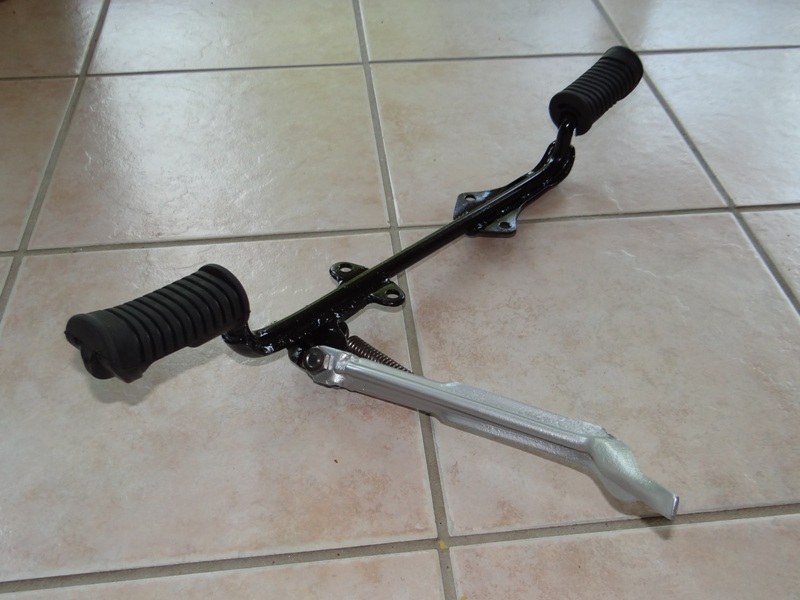
Otherwise, I have only a few tasks left to complete before reassembly can begin in July. I still have one more wheel to lace with new spokes. I’m still waiting for the wide white wall tires to arrive. I also have to clean some front suspension parts. I did manage to paint and reassemble the front foot bar and side stand assembly, pictured below. The rubber foot rests are new, replacing the original cracked and crumbled pieces. The foot bar and side stand were caked with decades of dirt and grease, hardened to a thick crust that I had to break away with a hammer before I could scrub the parts clean with steel wool.

Just more baby steps toward restoring this interesting little motorcycle.

Loading the parts into the Family Truckster:

Image

Foot bar and side stand are ready:

Image
Puzzleparadise
Posts: 75
Joined: Sat Mar 31, 2012 4:27 pm

Post by Puzzleparadise »

Very nice! Anxious to see her finished.. ;)
Spokes
Posts: 1575
Joined: Sat Apr 25, 2009 9:40 pm

Post by Spokes »

Sweet! What a great example of all of the metal parts to a CA95!
Larzfromarz
Posts: 620
Joined: Tue Dec 20, 2011 7:47 pm

Post by Larzfromarz »

I'm excited for you! Your timing is perfect as summer project to follow! Funny here in central Florida we (read I) quit working outside as much as possible while the rest of the world comes out. It's like our winter reverse effect but same results-
Just too damn hot- MY wife detailed the CD175 in the kitchen this past Sunday, man is she great! My Superhawk just watched from the dinning room...
Can't wait to see the build! Congrats!
ByTheLake
Posts: 730
Joined: Tue Oct 11, 2011 1:42 pm

Post by ByTheLake »

The painter called today to tell me that he started work. He'll correct some spots that I missed, then will re-sand everything before spraying with an epoxy primer. He'll apply a metallic black paint that I selected and will top it off with a clear coat.

The work will be done by June 26. Can hardly wait.
ByTheLake
Posts: 730
Joined: Tue Oct 11, 2011 1:42 pm

Post by ByTheLake »

With the Benly at the paint shop, I cleaned the few parts remaining that still needed attention.

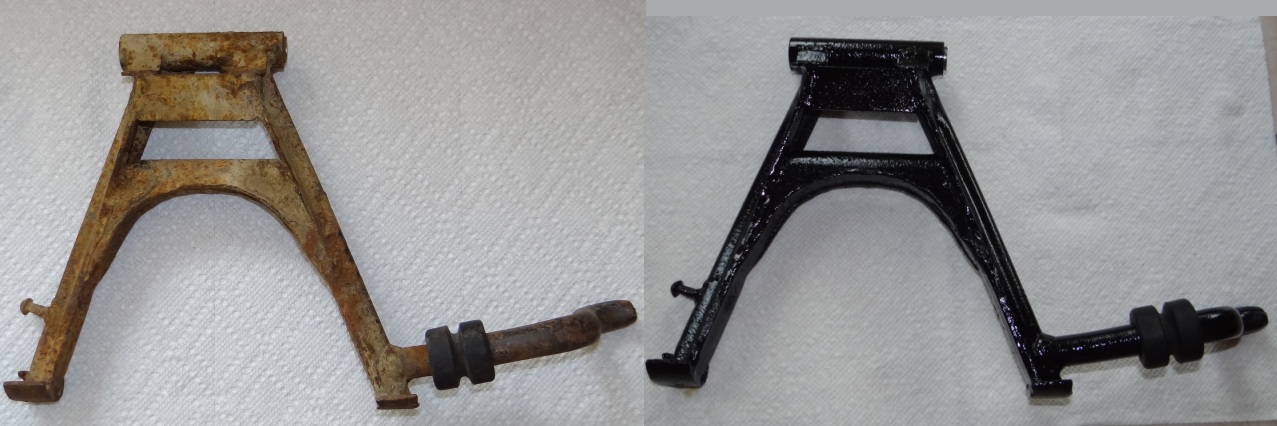
The center stand was the most rusted part on the bike. I spent an hour at the wire wheel to remove the heaviest rust, then soaked the center stand in Metal Rescue to dissolve the remaining rust. I coated it with Valspar Tractor and Implement paint, which is super-durable, and as an added bonus, is non-toxic to livestock.
Image

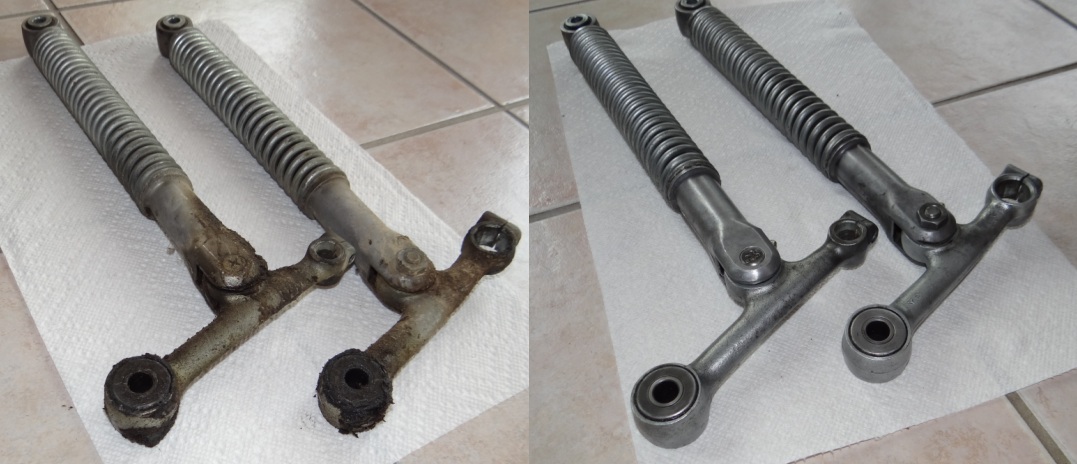
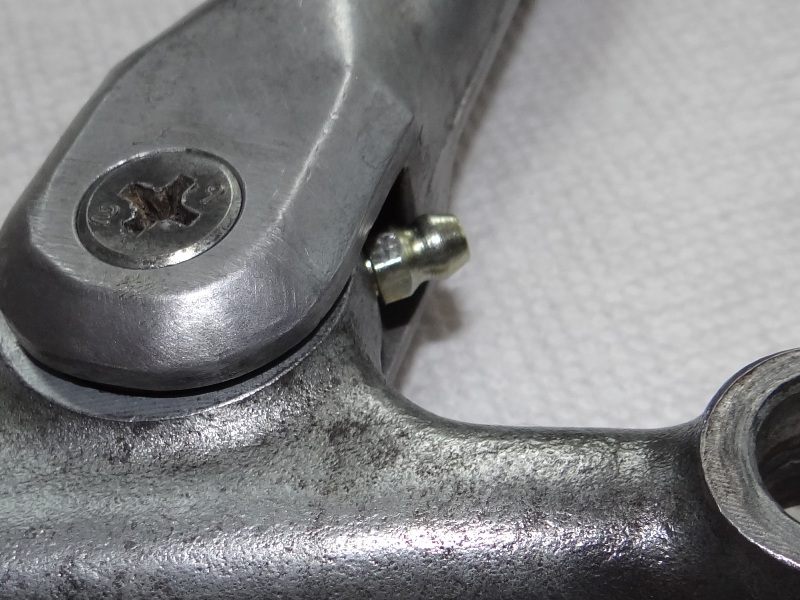
The front suspension gave me a few minutes of grief. When the crusty dirt and grease was removed, I realized that a grease fitting was missing from one side. These original grease fittings were pressed in, and unfortunately, were a bit smaller than modern grease fittings, so newer grease guns don’t fit the old fittings well. I decided to pull the remaining grease fitting, tap some metric threads into the holes, then screw in modern zerk fittings. After successfully tapping one hole, I broke the tap flush with second hole. With a bit of emergency ‘engineering’, I was able to back out the broken tap and preserve the threads. After cleaning the front suspension parts, I reassembled them with new grease fittings.
Image

Image

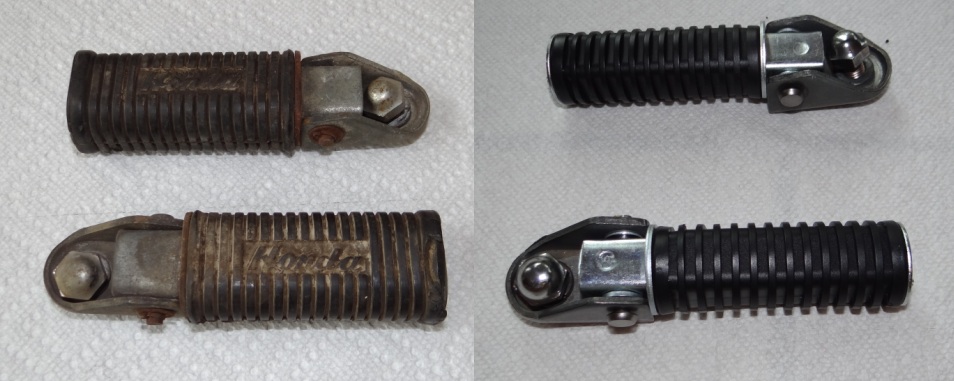
The rubber pads on the old passenger foot pegs were cracked in a few places, so I ordered replacement pegs. These weren’t as nice as the originals, and lacked the ‘Honda’ logo, but they’re clean looking. I won’t have passengers on this little bike anyway, but at least the foot pegs will look nice. The original Honda foot pegs will go into the archive box.
Image

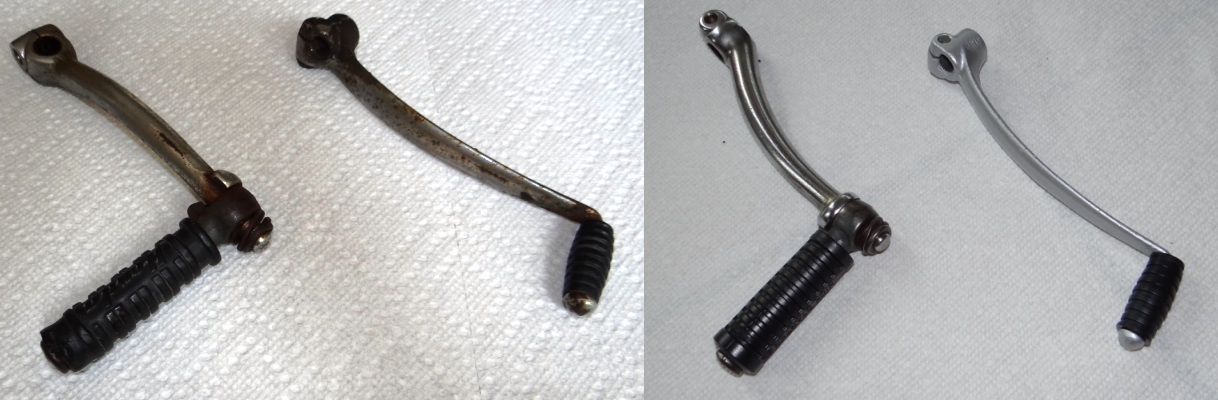
The kick starter and shifter lever also needed attention. There was pitting in the chrome, and the original rubber pads were in bad condition. The old rubber was cut away, then the levers were cleaned up with the wire wheel. This was enough to clean up the kick starter, but the shifter chrome was peeling away and looked bad. I decided to paint the shifter lever with aluminum engine paint to clean it up. Each lever got new rubber pads, and both look much better now.
Image

I’m nearly ready to reassemble this old motorcycle. I just need to get the parts back from the painter.
ByTheLake
Posts: 730
Joined: Tue Oct 11, 2011 1:42 pm

Post by ByTheLake »

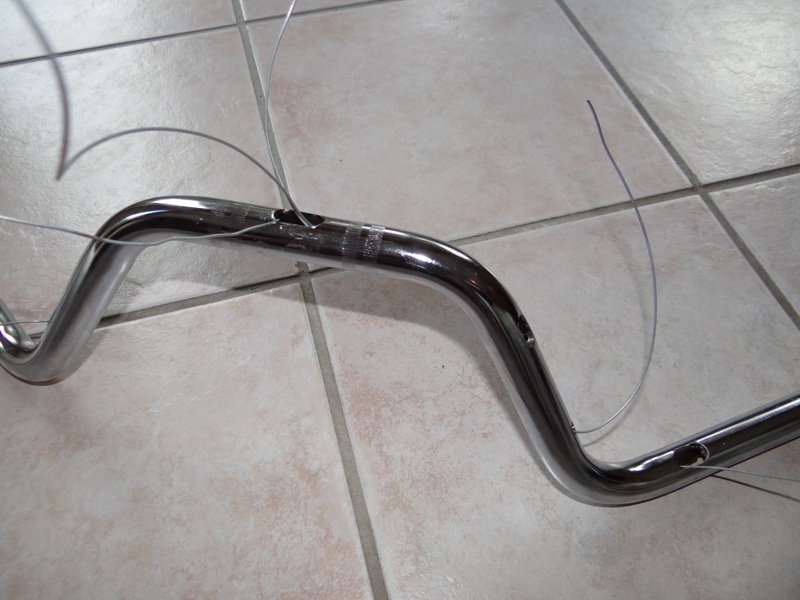
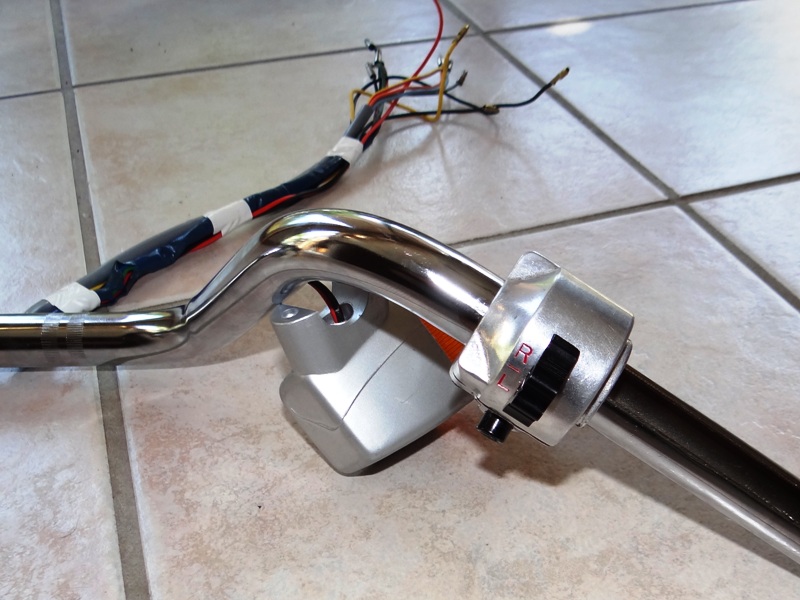
Today I wired the new handlebar. Since the original handlebar was quite bent, it was a challenge to remove the headlight and horn wiring, which was pinched where the bar was creased. With a little WD-40 the wires slowly came out without damage.

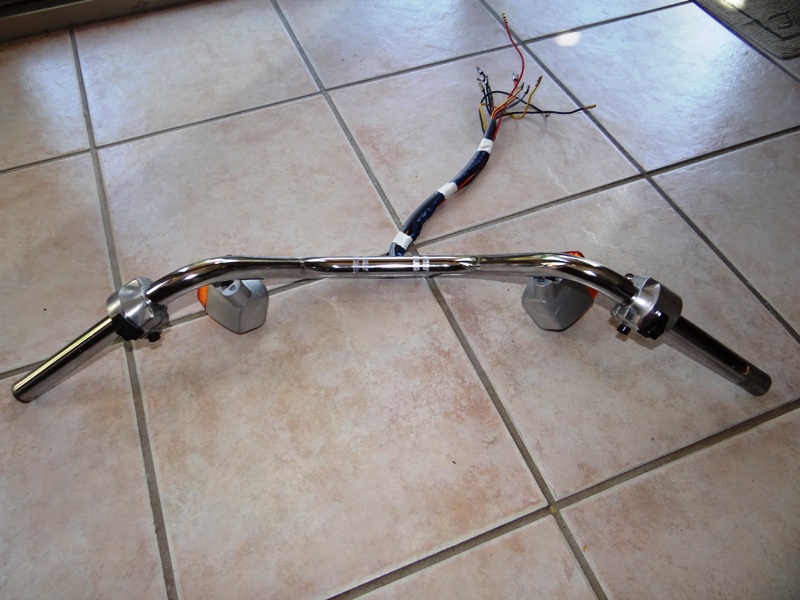
I ran bailing wire through the handlebar to help pull the wires through. Since I added the C95 turn signals and switch, there's extra wiring to squeeze through that wasn't originally there. The wires were temporarily taped to to the wrapped bailing wire to help them navigate the handlebar tube without binding.

Image

Image

Below is the C95 turn signal switch that Honda omitted from the CA95, since the turn signals were not compliant with US regulations (too close together). It'll seem odd to set the turn signals using my right hand, and sliding the switch up/down instead of left/right.

Image

UPDATE: The veterans out here probably recognized my error in the pictures above. I realized too late that I should have first slid the clutch and hand brake mounts onto the handlebar before threading the wires for the switches. I had to remove the switches and wiring, slide the mounts on first, then re-thread the wiring through the handlebar. Live and learn, I suppose. :)
Last edited by ByTheLake on Sun Jun 17, 2012 10:52 am, edited 2 times in total.
Buckets81
Posts: 79
Joined: Tue May 15, 2012 8:09 pm

Post by Buckets81 »

Where did you get the switch? Is that a $200 NOS job from Ebay or did you find another source? I want to put winkers on mine eventually but the NOS switches are a bit too rich for my blood.
ByTheLake
Posts: 730
Joined: Tue Oct 11, 2011 1:42 pm

Post by ByTheLake »

Buckets81 wrote:Where did you get the switch? Is that a $200 NOS job from Ebay or did you find another source? I want to put winkers on mine eventually but the NOS switches are a bit too rich for my blood.
I completely agree about the NOS prices for the switches. I got mine from Phil Denton Engineering in England, who made this spot-on aluminum replica. It still wasn't cheap ... $110.66 (£66.84), including shipping. Denton used to show the part on the web site, but now I don't see it. Perhaps it's still offered. It was listed as part code 35250212000. That price was quoted in October, 2011, when I purchased the part.
Last edited by ByTheLake on Sun Jun 17, 2012 10:55 am, edited 3 times in total.
Buckets81
Posts: 79
Joined: Tue May 15, 2012 8:09 pm

Post by Buckets81 »

That sounds a lot better than $200. I'll shoot him an e-mail when I'm ready to do it. Thanks for the info.
Jetblackchemist
Posts: 463
Joined: Thu Apr 28, 2011 10:59 am

Post by Jetblackchemist »

If you search ebay for Honda controls; then on the left side select used and year 1959-79 you get a lot of good returns. That's what I used to find mine, handle bars included for 20ish shipped.
ByTheLake
Posts: 730
Joined: Tue Oct 11, 2011 1:42 pm

Post by ByTheLake »

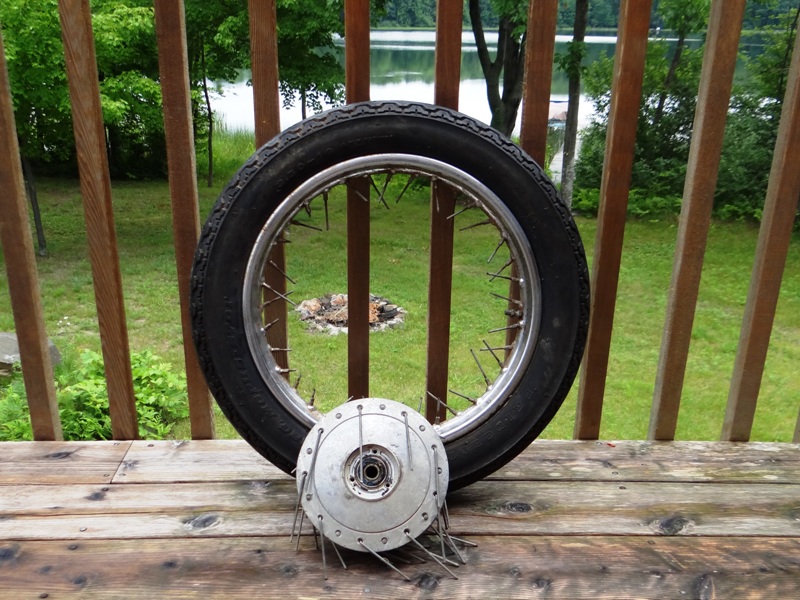
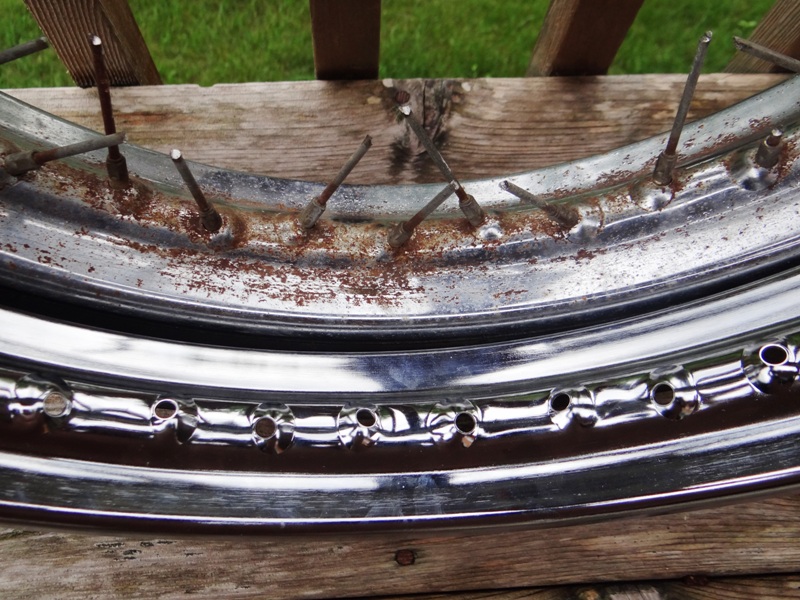
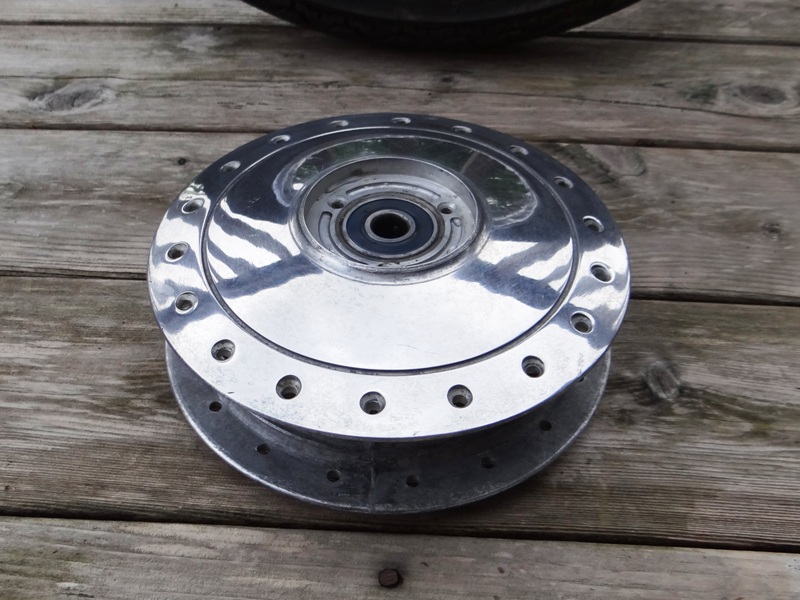
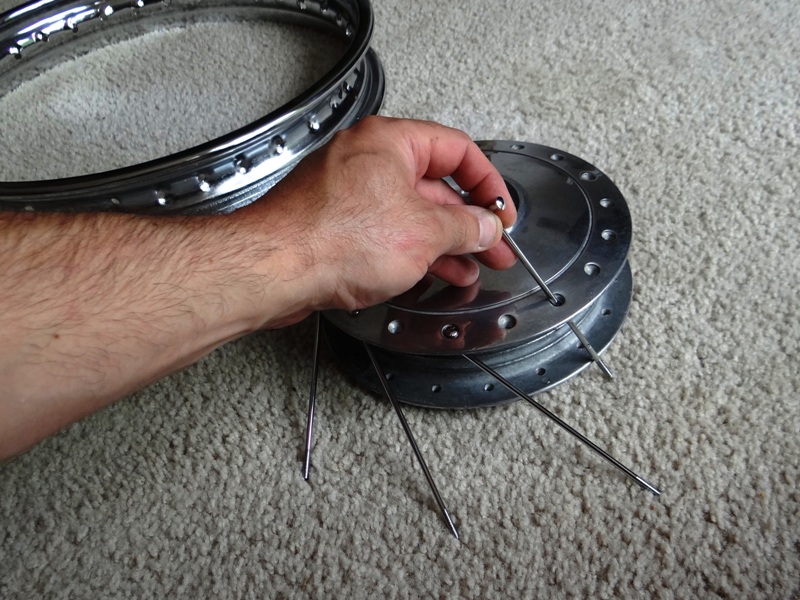
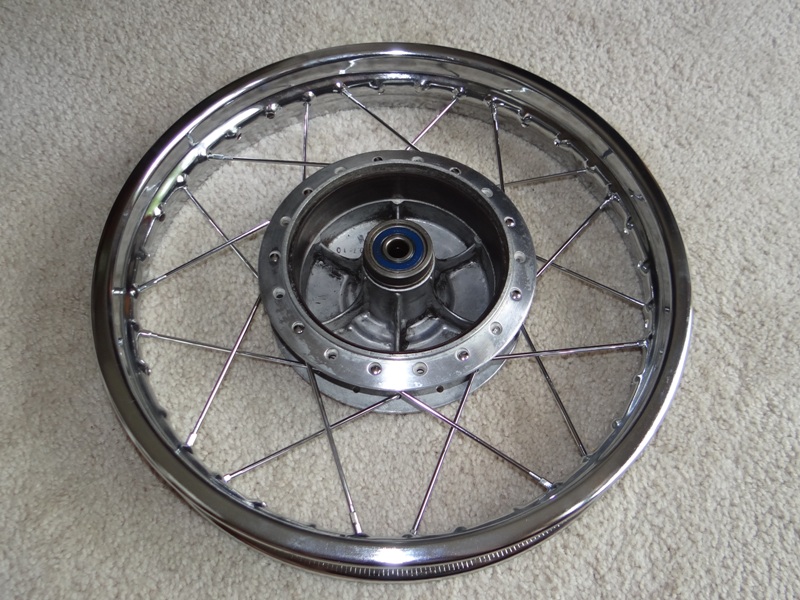
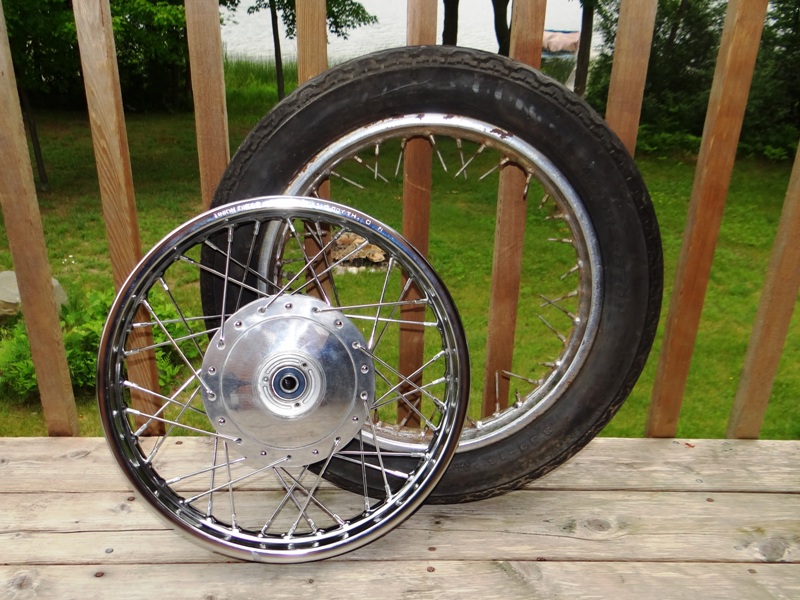
With this ’65 Honda CA95 project, I’ve learned that I like some tasks more than others. I dislike sandblasting, along with polishing aluminum. I do enjoy lacing spoke wheels, and today I laced the second wheel for the project. The wide white wall tires are still on back order, so I can’t show them yet.

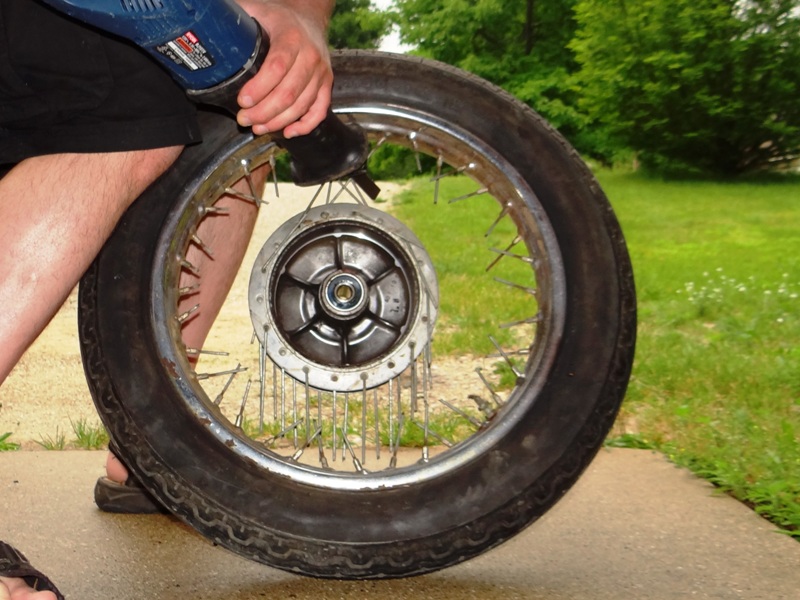
The original rims were just too rusty to use, and the ancient tires were so hard that I couldn’t remove them from the rims anyway. Using a carbide blade on the reciprocating saw, I simply cut away the spokes to free the aluminum hub. I cleaned the 5 decades of grime and oxidation from the hub with steel wool pads, then used 3 different buffing grits to polish the hub to give it a bit of shine.

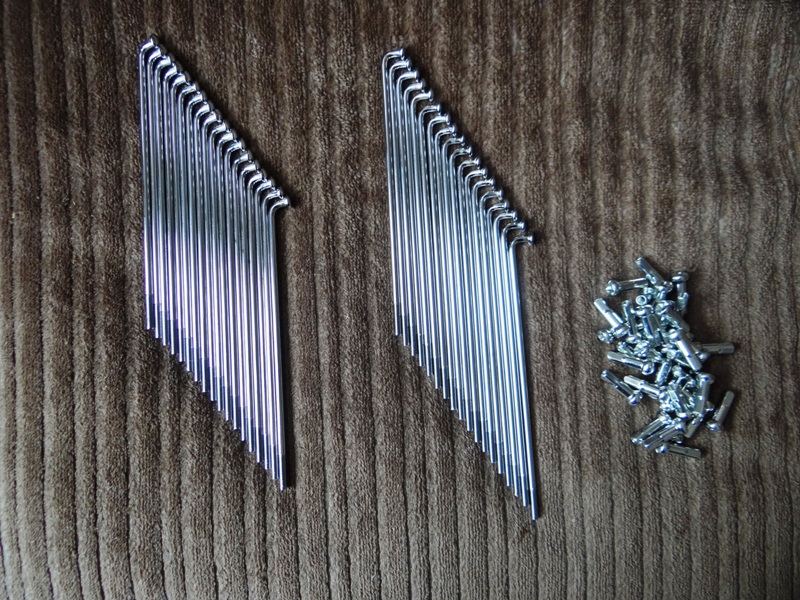
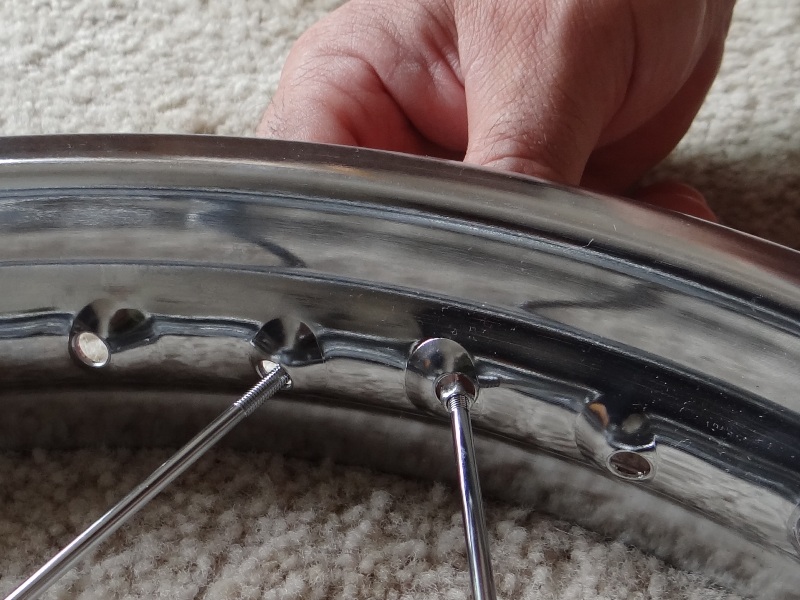
I separated the spokes into 2 groups, since there are both ‘inner’ and ‘outer’ spokes, distinguishable by the angle of the bend at the top of the spoke. The inner spokes were installed first, followed by the outer spokes. Each spoke received a new chrome nipple to hold it in place. The spokes have only been hand tightened at this point. I still have to ‘true’ the wheels later tonight.

The body parts should be back from the paint shop in 2 days, so I’ll start assembling the bike next weekend.

Image

Image

Image

Image

Image

Image

Image

Image

Image
Puzzleparadise
Posts: 75
Joined: Sat Mar 31, 2012 4:27 pm

Post by Puzzleparadise »

Very nice!

I found that I enjoy certain tasks much more when doing a resto as well...currently doing a tear down of an '84 Honda Interceptor, no matter what you touch it's just grime/gunk everywhere! I'll be glad to have every piece cleaned up and ready to put back together... :)
Post Reply