|
|||||||
| The Honda CA95 / Benly 150 Restoration The little brother to the CA160 in our family of Hondas |
 |
| Thread Tools |
|
#1
|
|||
|
|||
|
Hello Everyone,
I've been trolling this forum for many months and finally decided to dive into a CA95 project. I have not come across a Honda restore forum with such passion and detailed restorations; such a great forum  . .Well I started my project by purchasing a 1964 with 11.4k miles on the odometer, badly painted, broken ignition, flat tires, rusted tank, non running machine. The motor was not seized and the previous owner claimed that it did run at least 7 years ago, he was the 2nd owner and it has been 20 years since it was last registered. I wanted so bad to just jump in and start ripping everything apart but shoulder surgery has me at a stand still until I can move my shoulder and lift more than a few pounds. In the mean time I am collecting needed parts for the restore. Here are some pics Custom made key because previous owner lost the key and decided ruin it Since I was unable to do a tear down I decided to attempt to start this thing and just see where I stood with this machine and what I am up against. First off I knew the ignition switch was damaged but I was able to turn it with a screw driver, ok that was a plus. I took the head lamp off and saw a melted shorted mess with the ignition wires, I was able to separate the wires and tape some insulation on them, so far so good. I purchased a new battery and none of the lights worked, found that all the bulbs were blown but not a show stopper. Ok a temporary fix to the electrical and now need to tackle the fuel system. I didn't even think about using the original tank because of the rust and the petcock was stuck. I rigged up a temporary tank using a small plastic bottle and the hoses you see in the picture. I checked the oil level and it appeared to be fine. The spark plugs looked fine and I knew I could get spark from them after repairing the electrical mess. I filled the temporary fuel tank flipped the choke on, a twist of the screw driver on the ignition switch, hit the start button a few time and guess what, the damn thing fired right up! I was amazed how easily it started; minor adjustments to the air and idle screw and it was running great, no smoke and a crisp response from the throttle. I was so happy I had accomplished this with one arm and one hand.During my shoulder rehab I spent many hours reading this forum and on the computer just ordering parts. Now I know there are a lot of Honda purist here but I decided to take my build in just a slightly different direction. I bought from a swap meet a solo seat more in-line curves of the frame, sort of a bobber look. I decided to go with some clubman cafe bars and I am considering going with more chrome than you would normally see on a CA95. Not to worry you purist out there I bought a second CA95 that originally was to be used as a donor bike but what the hell, I'll restore this one to original. Today I bought a used ignition switch off a CA77 from a guy I met at the swap meet for just $50 and it works and looks just fine. Well sorry for the long winded story but I will post picture as soon as I am able to tear down the machine. Thank you all for your contributions to this forum, it certainly has helped me. Mike Last edited by Nobogy; 01-17-2012 at 11:02 PM. Reason: update pics for protocol 
|
|
#4
 01-18-2012, 01:13 AM
|
||||
|
||||
|
Welcome aboard, and thanks for sharing the pics. Many of us have started with less of a bike than what you have, and yours runs! Also, the exhaust looks good from what I can see. These machines certainly accumulate "adjustments" over the decades. My wiring was customized by a family of mice.
I'm in a similar situation, just having had wrist surgery on my right wrist, with my left wrist being scheduled for February. That puts a damper on progress. I've currently ordered 30 of the 40 parts I've identified that I'll need for the restoration. Keep us posted as you make progress, no matter what direction your project takes.
|
|
#5
01-18-2012, 02:14 AM
|
||||
|
||||
|
Hi Mike. Lookin like you are off to a good start there. I'm sitting here looking at your pictures and something just looks different. It's because your bike is backwards in terms of what is looking worn out. Usually when these little Hondas are in rough shape the tires are super shot and the exhaust is falling off. But your bike looks like the tires are new and the exhaust, rims and chrome on the shocks all looks really good! Those are the expensive bits so you already have a head start on your resto right there.

|
|
#6
01-18-2012, 04:55 AM
|
|||
|
|||
|
Hey ,Welcome aboard !! Looks like a nice find and now you have 2 of them ,that's better yet .
I think for me part of the appeal of these bikes are ( 1 ) their seldom seen and people are curious about them . Many of my generation remember these bikes as thier first rides . ( 2) There's a satisfaction you get from bring these old long forgotten bikes back to life . Recycling at it's best . Now if I can offer any advice , Pull the wiring harness out of the bike , out of the handle bars and the power cable to the starter and make sure every wire is inspected and brought up to snuff . I have 4 of these bikes and 3 of them were dead when I bought them and all 3 needed major wiring repairs . The last bike I bought actually ran and when I stripped the bike I was amazed that anything worked with the wiring as bad as it was . Anyway ,welcome and keep us informed of you progress ,we learn from each other and we all appreciate each persons contributions .
|
|
#7
01-18-2012, 07:57 AM
|
|||
|
|||
|
Thanks for your comments guys. By The Lakes, I feel for you, I hope your wrist gets better soon, it's just temporary for us and makes you appreciate the handicap and our wounded warriors just that much more. It is amazing what mice can do, your frame was packed
 Smithers, I have seen what most of you had to start with for your restoration and that's why you guys amaze me, mine looks like a piece of cake compared to most of the restorations on here. My pictures don't show the rust very good but I have the usual badly pitted exhaust pipes, bars and rims, the rear tire is badly cracked and cannot be used, there is a dent in the gas tank, the filter, filter tube, carb cover and chain cover are missing; I agree I have a really good resto starter. The price started out at $1k and I was able to pick it up for $500. My second CA95 I picked up for $200 but it was in pieces missing about 15% of the parts, I'll Post picture of that one later. Kartgreen, I start tinkering with the idea of restoring a 60's CL350 into a cafe racer but then I came across these dream bikes and remembered as a kid, my neighbor having a 305 dream and how cool they looked; I just love the classic lines of the bike and it's rare to see them on the road. I have found more damage to the wire harness leading to the solenoid, I had to repair that too. I agree, I will need to thoroughly inspect the harness once I remove it. Thanks guys more pics on the way and more parts ordering to do. Mike
|
|
#9
01-24-2012, 06:38 AM
|
|||
|
|||
|
Hi Guys,
May I ask what you are finding are a must replacement parts when rebuilding the engine? I am ordering parts in preparation of my engine rebuild and currently have on my list the typical gasket kit, oil seals, pistons and rings; are you guys replacing crank bearings, cam chain and tensioner also, any thing else I should be aware of? I realize the list may grow once I do a teardown. Thanks, Mike
|
|
#10
01-24-2012, 08:00 AM
|
|||
|
|||
|
Look up Ohiocycle on google , he has most of what you need . You'll have to call to verify he has the parts and then send a cashiers check or a US Postal money order . Kinda old school but he's usually very quick .
Western Hills Honda is another good source , they have the parts look-up feature but that doesn't mean the parts are available , you have to give them a call also . They do take credit cards so it simplifies things a bit .
|
|
#11
02-09-2012, 06:11 PM
|
|||
|
|||
|
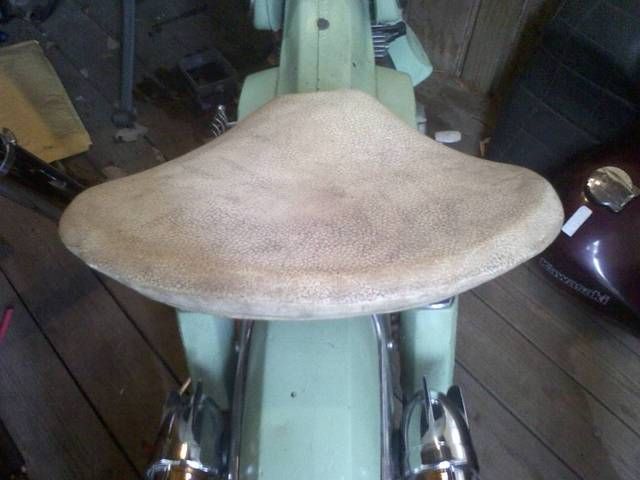
Well, I got a little ambitious the last couple of days and decided to do a solo seat and clubman bars mockup. The solo seat is a Le Pera solo seat I bought off a guy from the swap meet, it came off his Harley and I thought it would fit my application just fine. I had to manufacture up my own brackets for both front and rear, looks a little rough now, I'll cleanup later, but I wanted to see how both parts fit my riding position before I did a teardown. I went with a longer solo seat so that I could move my butt back a little further and create a more forward lean ride position, plus it fills the gap between seat and tank. I was satisfied with the new seat position, and maybe I could hit that 55mph mark in a tuck position
.I am not completely sold on the cafe clubman bars I may go with a more mild M style low position bars or may just go back to the stock look since I have two more builds to experiment on. Just thought I'd share what little progress I have made before I do a complete teardown once my shoulder is able too. Here are some pictures.
|
|
#12
02-10-2012, 01:39 AM
|
||||
|
||||
|
With my CA95 project I've been debating the solo vs double seat topic for months. I like the looks of the solo seat but I'm certain that I need more room. I'll likely just go with the double seat.
Wishing you a speedy recovery with the shoulder. I had my final wrist surgery 2 days ago so I'm looking forward to working on my project in another 6 weeks or so.
|
|
#13
02-10-2012, 03:23 AM
|
|||
|
|||
|
I redid my seat from the bicycle mod on here to what I believe is from an old Cushman, the spring bolt holes lined up exactly on top of the back seat mounts on the fender braces so I bolted the pan directly into them, I was having the same uncomfortable ass problems even on the original long seat. It's very comfortable now and I sit directly over the rear shocks. I'll upload some pictures of the seat when it gets light outside, and my lady heads into work.
|
|
#14
02-10-2012, 08:08 AM
|
|||
|
|||
|
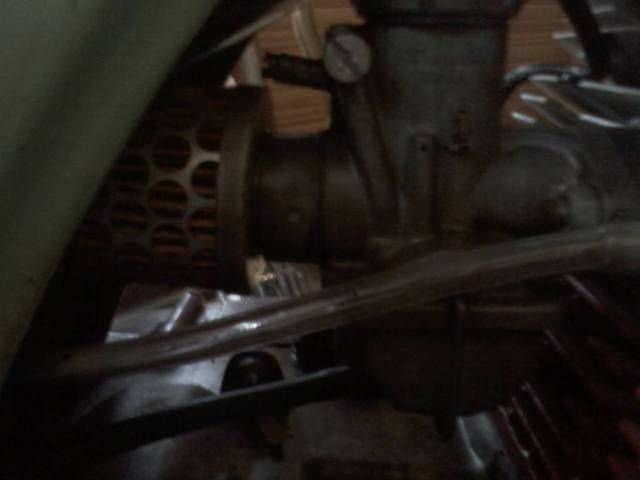
As mentioned here's my solo seat meant for comfort, and a bonus air filter mod photo.
    Nobogy, I hope your shoulder convalescence goes super quick so you can get to your build A.S.A.P. have you given any thought as to color schemes? I think the PO had color blindness. If you haven't thought of anything too out there like mine...Detroit diesel green with red rims. Kellies white 305 looks amazingly clean, if I ever build another it's going to be a clone of her bike.
|
|
#15
02-10-2012, 03:11 PM
|
|||
|
|||
|
Thanks guys for the well wishes, shoulder is coming along fine. By the lakes, Wow two surgeries got to be tough, hope your rehab goes well, by that time the white walls should arrive.
Jetblackchemist, that looks like a very comfy seat, from the position it looks like you might be a tall person. What is the chrome thingy on top of the right side cover, looks like an ignition switch? Yeah, Kellie's bike is sweet looking in white and that solo seats is fitting for that bike. I plan on painting this build a candy blue with just a little more chrome accent pieces, such as the chain guard. Build number two will be a pearl white likely all stock except for it too will have a solo seat. Question for the experienced, how do you remove the chrome caps on the forks, I'd like to remove my front fender? There seems to be a slot on the bottom to pry it out but I'm not having any luck and don't want to damage to the forks body, I already bent my screw drive tip; any advice would be helpful. Thanks - Mike
|


")

