|
|||||||
| The Honda CA95 / Benly 150 Restoration The little brother to the CA160 in our family of Hondas |
 |
| Thread Tools |
|
#1
|
||||
|
||||
|
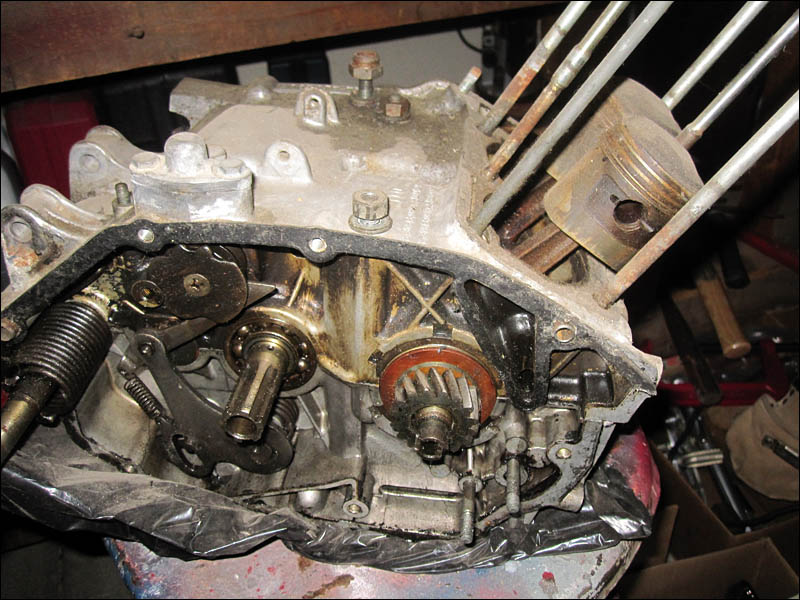
Well just for fun I decided to pop out the old piston pins and have a look at one of the pistons from my old CA95 parts engine. This engine was left outside with the exhaust port open literally seizing up the engine with rust in the upper cylinder as result from being exposed with the exhaust valve open. But the piston pins came out in only a couple of minutes with the use of a c-clamp, a 11/32 socket and a 9/16 socket. Here is how I put them to use:

|
|
#2
 05-04-2011, 03:51 PM
|
||||
|
||||
|
First take the piston pin clips out on each side!
Then I wanted to make sure and pop the pin loose by inserting a small socket into the piston hole on the one side here. Then apply pressure from the clamp and it broke free without much force at all. 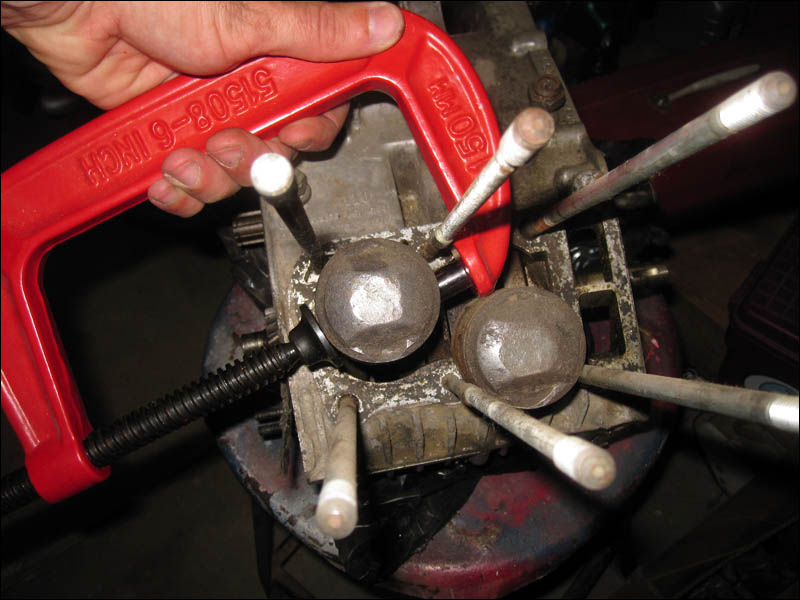
|
|
#3
05-04-2011, 03:54 PM
|
||||
|
||||
|
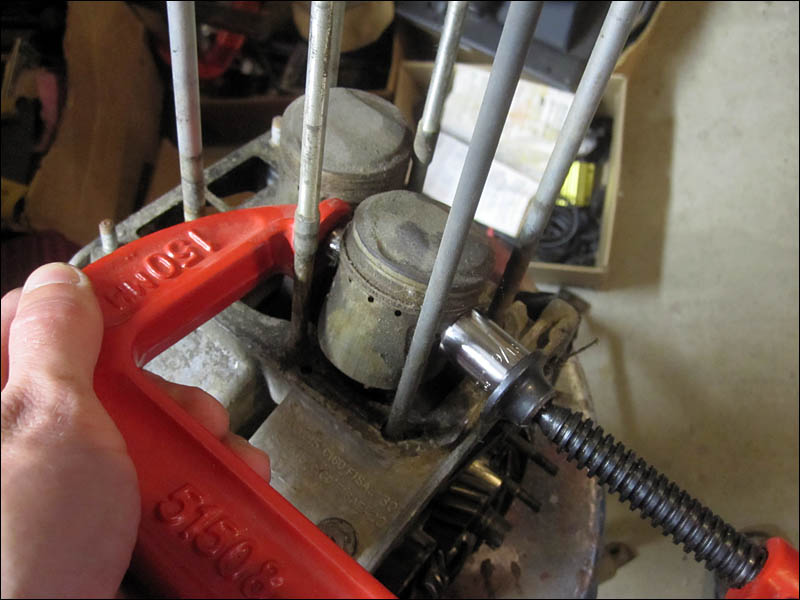
Then I got a socket that was just a bit larger than the pin so that I could put it over the pin on the exit side and still apply force with the foot of the c-clamp on that side so it would be in line with the pin.
 And there you have it. Regardless of the slight corrosion from decades of sitting around I was able to pull the pin out the rest of the way with my fingers. 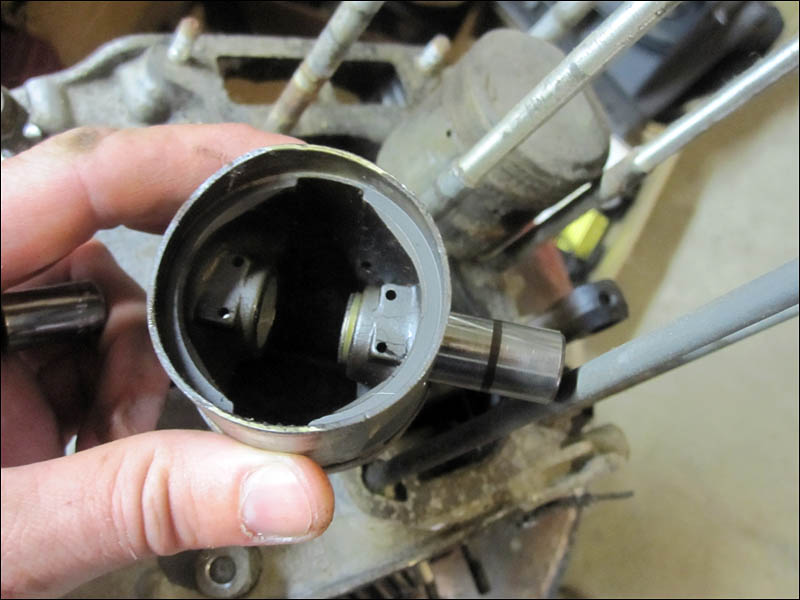
|
|
#4
05-05-2011, 04:33 PM
|
|||
|
|||
|
Very nice, Smithers nothing like finding an easier way to do things...Think smarter not work harder. It reminds me of my little rubber hose that I use to start spark plugs threads with, as well as fish the suckers out the hole. Speaking of rubber hoses I cleaned my carb yesterday mostly using a hose to put over any and all holes and blow them out, and I pipe cleanered the larger ones they all flow freely now and I didn't have to remove a single thing.
|
|
#6
05-18-2011, 02:21 AM
|
|||
|
|||
|
Ok ya got me I decided to crack the head, To see what was going on in there.
|
|
#8
05-18-2011, 01:42 PM
|
|||
|
|||
|
For a 63' last ran in about 75' or 76' it does look really good, in fact when i saw what I was dealing with I could have sat down and cried it looked so nice minus the heavy carbon. I did figure out why one side wasn't sealed good and that side of the exhaust port was so black...some numb nut took off one the 6mm nuts down there on the base and put some barely fitting wobbly standard thread on there...thats why one corner looks wonky. I am gonna clean the carbon out, I may go up the street to this cycle shop and see if they do any valve work, I'd do it myself but I may have it bored out leaving room for another upsize or two in case its ever needed, shave a few thousandths off the head and port it...I might as well hot rod it since I cracked it. p.s. put your plugs in before you reassemble so you can get the spark gap facing the intake port, for a nice solid combustion, helps keep them fouling up easily from exhaust gas back pressure too...Oh, I almost forgot, I am going to cut out a section of flange that blocks part of the breather flow too...you know the thin metal piece between the gaskets? That hole falls right on that flange,
thats why i am cutting it out. BTW does anyone know why that thin metal piece is used between the gaskets? Is it supposed to be some sort of weird reed valve? Last edited by Jetblackchemist; 05-19-2011 at 12:53 PM. Reason: Added another question at the end there.
|


