Starting a '65 CA95 Restoration
Sometimes I cringe when I think that my bike's previous owner had intended on just cleaning the carb and seeing if he could get the CA95 to run. Based on what I now know, he'd never have succeeded, but as I dig deeper with this restoration, it's clear that he would have only made things worse.
While my cylinders are at the machine shop getting bored .25mm over, I decided to take apart the speedometer drive. I'm glad I did, because deep within the grease, I found some little metal surprises.
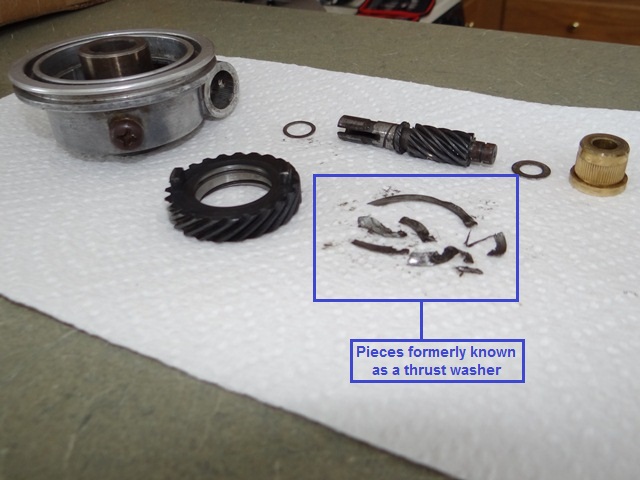
I found what used to be a thrust washer, all ground up and settled into all the corners and between some gear teeth. This just reinforced my belief that everything needs to come apart for inspection before these vintage machines go back on the road.
Fortunately, the worm gear teeth are in decent shape, so I'll get another thrust washer and put this back together with some new grease.
While my cylinders are at the machine shop getting bored .25mm over, I decided to take apart the speedometer drive. I'm glad I did, because deep within the grease, I found some little metal surprises.
I found what used to be a thrust washer, all ground up and settled into all the corners and between some gear teeth. This just reinforced my belief that everything needs to come apart for inspection before these vintage machines go back on the road.
Fortunately, the worm gear teeth are in decent shape, so I'll get another thrust washer and put this back together with some new grease.
Oh boy look at that. I just always say that these old Hondas were usually parked for a reason.  Besides finding out what's going on inside it's important to make sure all the surfaces are assembled with oil and grease so that when things get moving there isn't any accelerated wear. Grindings and shavings left behind from the old oil or worn out parts can quickly ruin things inside. Not that you don't know this Just thinking out loud. I have found some horrifying things inside old engines. It's amazing how I've seen some grown men try and add oil to an engine and expect to start it up! haha
Besides finding out what's going on inside it's important to make sure all the surfaces are assembled with oil and grease so that when things get moving there isn't any accelerated wear. Grindings and shavings left behind from the old oil or worn out parts can quickly ruin things inside. Not that you don't know this Just thinking out loud. I have found some horrifying things inside old engines. It's amazing how I've seen some grown men try and add oil to an engine and expect to start it up! hahaWith electric service restored after a 3 day weather-related outage, I’ve jumped back into the CA95 project. I’ve set a goal to have the engine put back together before the end of March, assuming that the machine shop doesn’t take too long to bore and hone the cylinders. Meanwhile, I decided to tackle the job of rebuilding the rear shocks.
Spokes did an awesome jobin this thread describing and illustrating the proper process to disassemble the rear shocks. Lacking his mechanical prowess and breadth of tools, my supplemental method of disassembling the old Honda shock is illustrated below, along with a handy guide to the special tools required for the job.
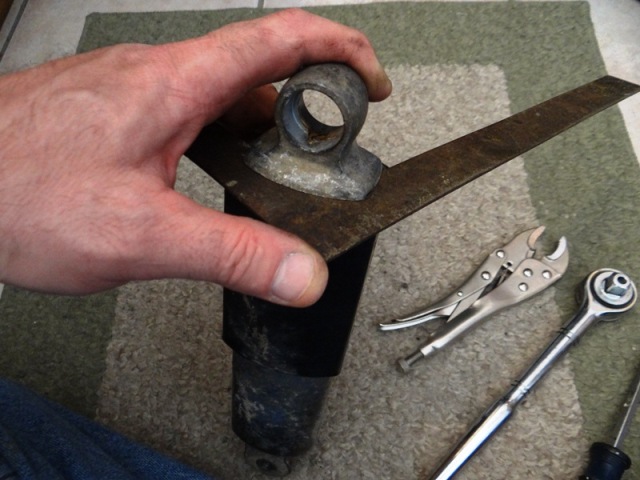
Step 1: Gently insert a rusty framing square under the upper cap
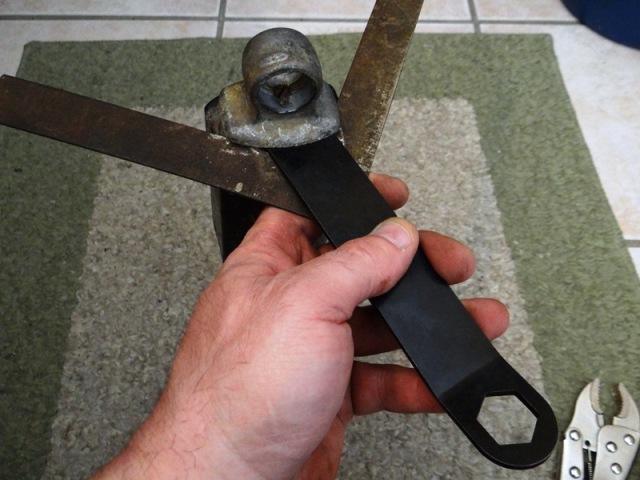
Step 2: With a garbage disposal wrench, slowly pry the upper end away from the framing square
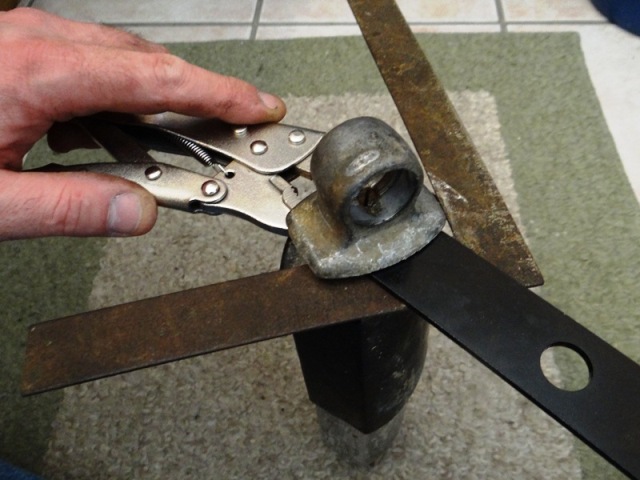
Step 3: Since the next step requires a 17mm wrench but my set stops at 16mm, insert a locking pliers and lock it tight around the flat sides of the nut
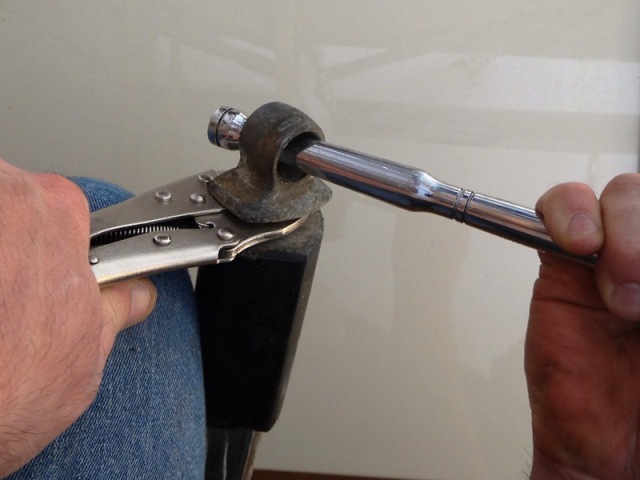
Step 4: With a ratchet handle, unscrew the upper cap
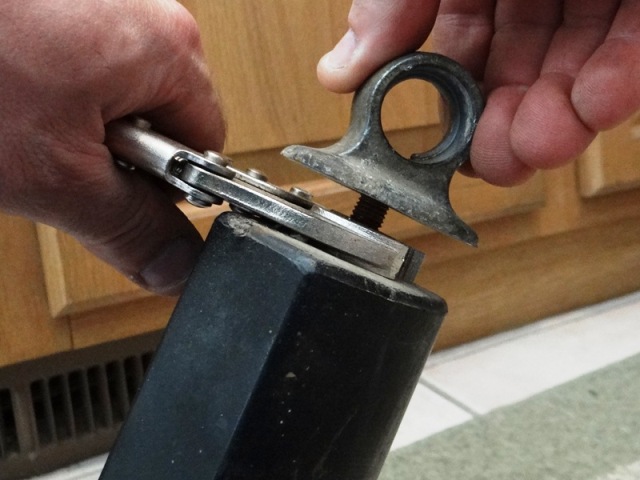
Step 5: Finish unscrewing the upper cap
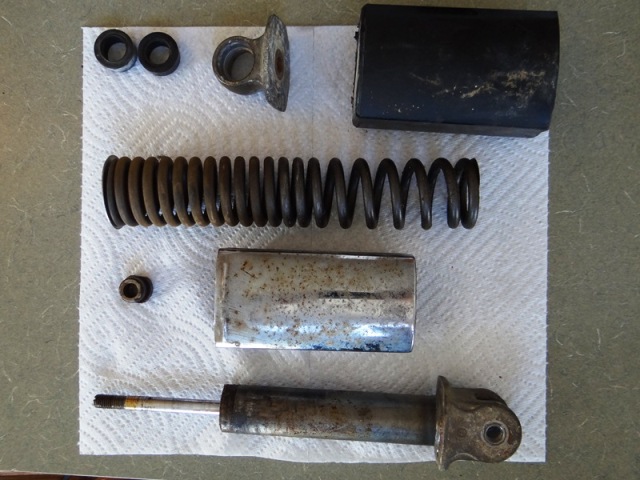
Step 6: Observe the corroded mess of parts
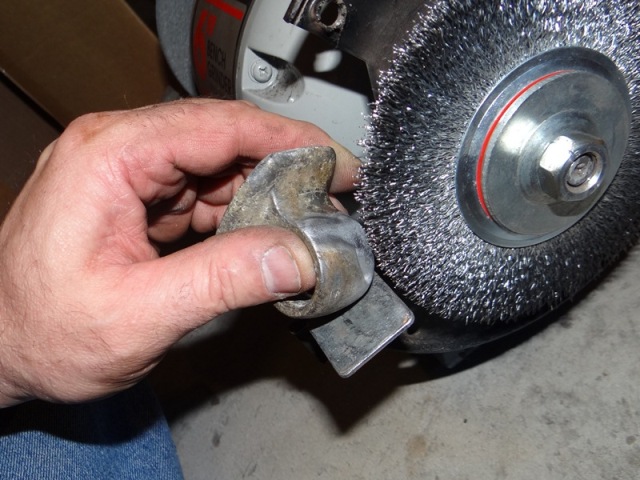
Step 7: Clean parts with a wire wheel and steel wool as needed
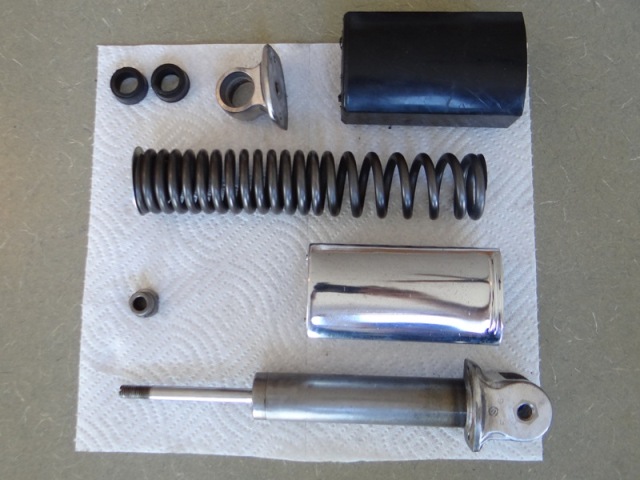
Step 8: Observe the shiny happy parts.
Since the black plastic housing will be painted when the rest of the bike gets painted, I'll defer the reassembly of the shocks until then.
Meanwhile, I thank Spokes for illustrating the correct way to disassemble the shocks, since I don't expect most restorers will have my special set of tools.
Spokes did an awesome jobin this thread describing and illustrating the proper process to disassemble the rear shocks. Lacking his mechanical prowess and breadth of tools, my supplemental method of disassembling the old Honda shock is illustrated below, along with a handy guide to the special tools required for the job.
Step 1: Gently insert a rusty framing square under the upper cap
Step 2: With a garbage disposal wrench, slowly pry the upper end away from the framing square
Step 3: Since the next step requires a 17mm wrench but my set stops at 16mm, insert a locking pliers and lock it tight around the flat sides of the nut
Step 4: With a ratchet handle, unscrew the upper cap
Step 5: Finish unscrewing the upper cap
Step 6: Observe the corroded mess of parts
Step 7: Clean parts with a wire wheel and steel wool as needed
Step 8: Observe the shiny happy parts.
Since the black plastic housing will be painted when the rest of the bike gets painted, I'll defer the reassembly of the shocks until then.
Meanwhile, I thank Spokes for illustrating the correct way to disassemble the shocks, since I don't expect most restorers will have my special set of tools.
Last edited by ByTheLake on Sun Mar 11, 2012 12:26 pm, edited 1 time in total.
I'm still aiming for an original appearance with my CA95 restoration, but I have purchased some 'adornments' for the bike to give it a unique twist. One such item is this little brown leather saddlebag.
It's an eBay treasure that I picked up for $29.99 last week. It's a '60s Honda saddlebag. I'm doubting that it's a true Honda accessory, but rather it appears to be a hand-tooled bag that was made as a one-off. Has anybody seen bags like this?
The bags are small ... 8" x 10", but they'll fit over the rear shock just fine. I think this just might be a neat way to top-off the project. If I don't like the appearance, I'm sure I can get my $29.99 back.
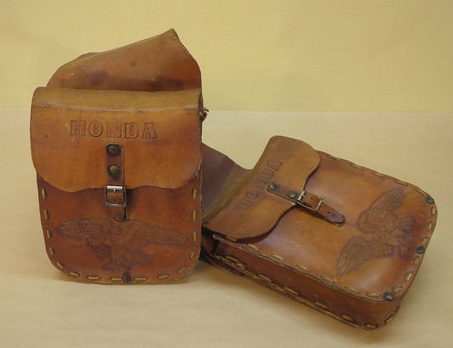
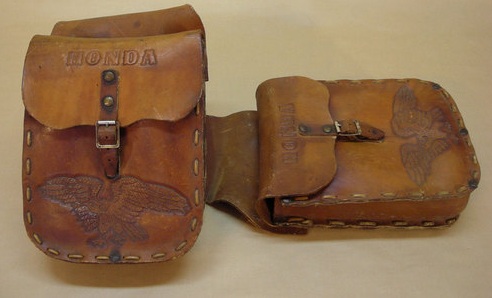
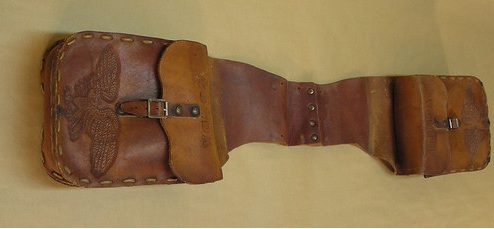
It's an eBay treasure that I picked up for $29.99 last week. It's a '60s Honda saddlebag. I'm doubting that it's a true Honda accessory, but rather it appears to be a hand-tooled bag that was made as a one-off. Has anybody seen bags like this?
The bags are small ... 8" x 10", but they'll fit over the rear shock just fine. I think this just might be a neat way to top-off the project. If I don't like the appearance, I'm sure I can get my $29.99 back.
With the cylinders back from the machine shop after being bored and honed .25 mm over-sized, I started to reassemble the engine today. These pictures aren't a whole lot different from what others have already posted, but I'll post them anyway.
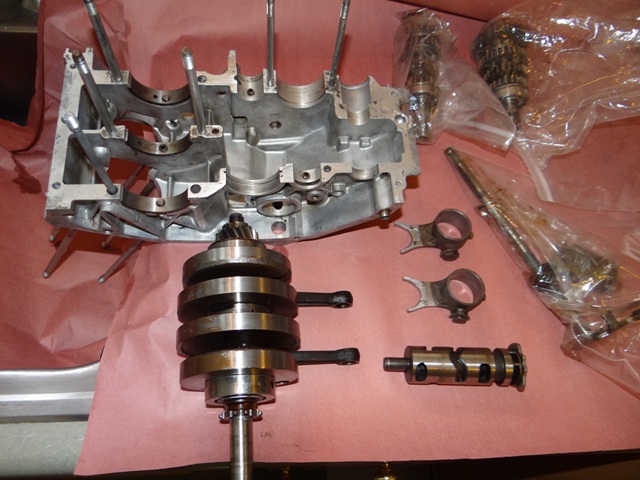
Below, the upper engine case is ready to receive the parts.
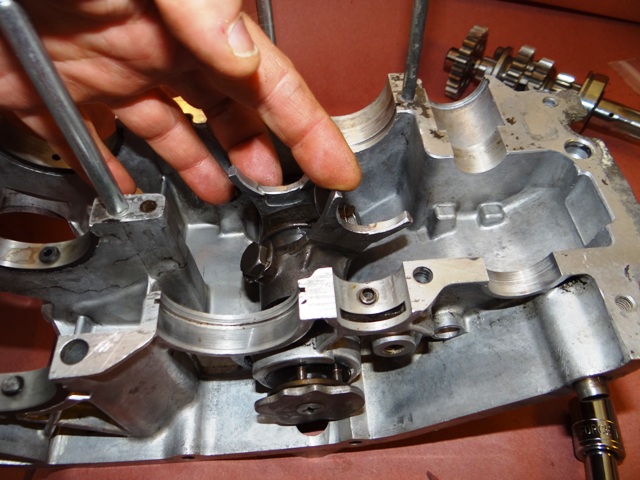
Below, the shift forks are installed but not yet torqued and locked in.
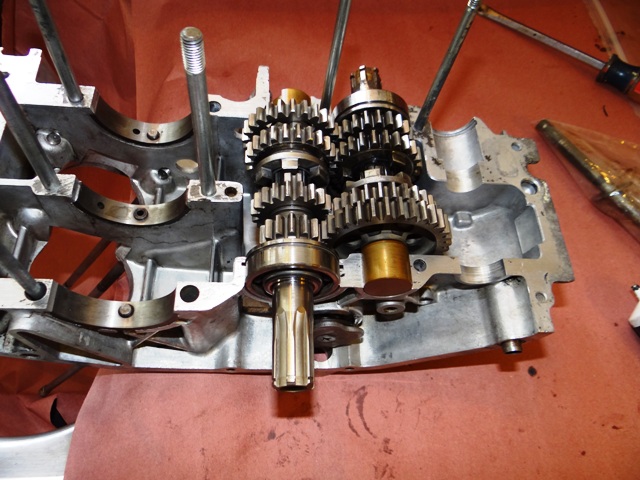
Below I've added the pair of transmission shafts. I was able to shift manually through all 4 gears.
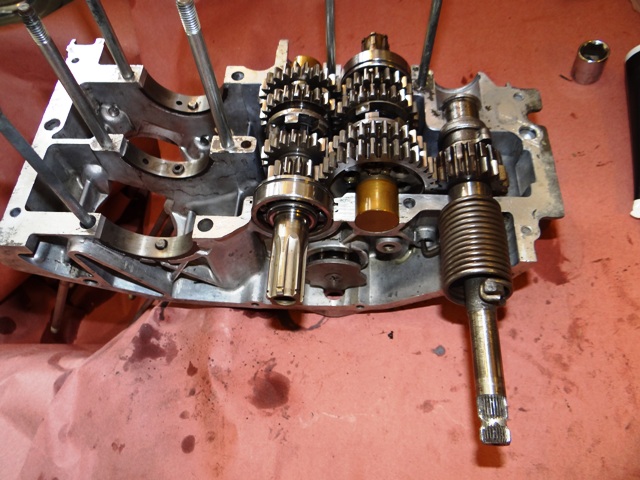
Below I finally got that kick-starter shaft in. The spring was a pain but I finally got it installed.
The crankshaft is set in place below. It took a few seconds to get the pegs aligned but it set in nicely after that.
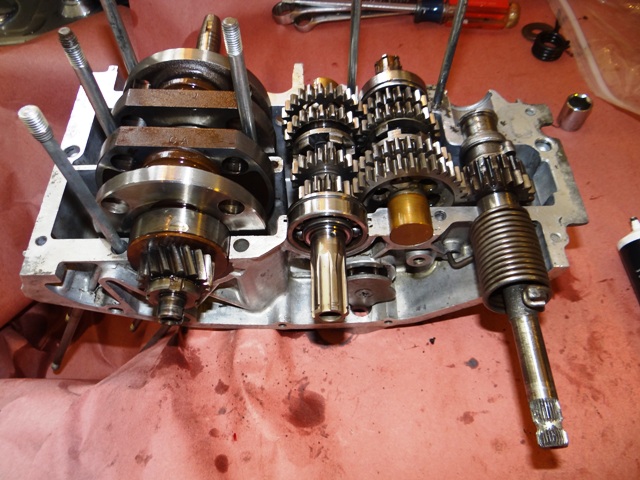
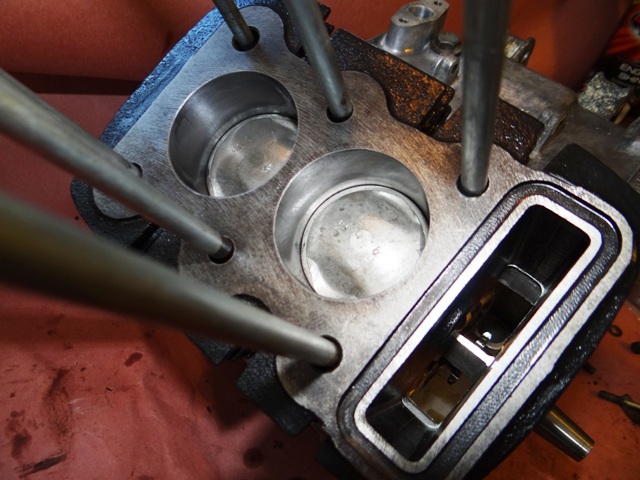
The new over-sized pistons are resting nicely in their cylinders below.
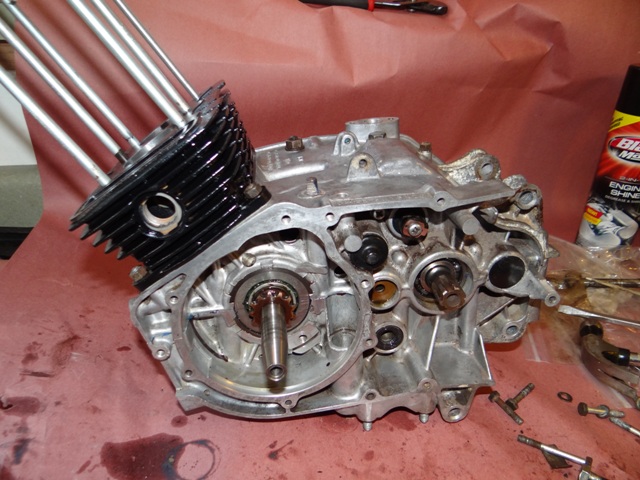
Below the cylinders are mounted on the engine case. Still a long way to go, but things are progressing.
Below, the upper engine case is ready to receive the parts.
Below, the shift forks are installed but not yet torqued and locked in.
Below I've added the pair of transmission shafts. I was able to shift manually through all 4 gears.
Below I finally got that kick-starter shaft in. The spring was a pain but I finally got it installed.
The crankshaft is set in place below. It took a few seconds to get the pegs aligned but it set in nicely after that.
The new over-sized pistons are resting nicely in their cylinders below.
Below the cylinders are mounted on the engine case. Still a long way to go, but things are progressing.

-
Jetblackchemist
- Posts: 463
- Joined: Thu Apr 28, 2011 10:59 am
Just a plain 'ol high-temp engine paint on the cylinders. It's designed for engines, and I used this brand on previous restorations without any issues.frappy wrote:Also, what type of black coating did you use on your cylinder barrel? I'm sure it's fuel resistant?
p.s.: How's your wrist doing since the surgery?
Thanks for asking about the wrists. Both are doing well, almost back to normal. It's still hard to pinch and pull, like when you open a bag of potato chips, but I can lift and use tools without any discomfort.
I'm looking for a reputable leather restorer that will clean and rejuvenate the bags. They're in good share but a tad stiff, so it would be nice to make them more flexible. Funny what you find on eBay.Jetblackchemist wrote:Nice find on the saddle bags; if you end up not liking the way they look, don't send them back...I'll double what you have paid into them.
-
Jetblackchemist
- Posts: 463
- Joined: Thu Apr 28, 2011 10:59 am
Top grain leather is supposed to be stiff, you can put some stuff called: Saddle Soap on them. It will keep them from drying out and cracking, you put on the saddle soap and give it a buff just like shining shoes...I'd avoid any shoe polish though.
They might have some stuff for leather baseball gloves in a sports store; if you can't find a tack shop...although; most people would probably just toss a glove and get a new one instead of take care of it.
They might have some stuff for leather baseball gloves in a sports store; if you can't find a tack shop...although; most people would probably just toss a glove and get a new one instead of take care of it.