Page 2 of 8

Posted: Sat Nov 05, 2011 1:58 pm
by ByTheLake
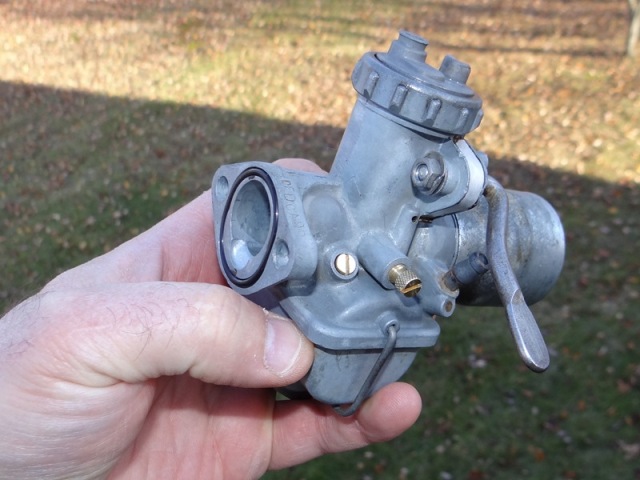
Made some minor progress today with the bike. After disassembling and cleaning the carburetor parts with mineral spirits, I did a second cleaning of the carburetor parts in an ultrasonic cleaner. Most of the parts in the Keyster carburetor kit fit, and the new fittings and springs appeared to be of decent quality, although the kit lacked a new float valve. I thought that was a bit odd.

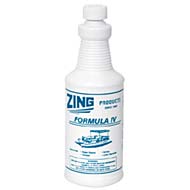
I finished off the carburetor like anybody else does ... with a quick spritzing of Zing Formula IV cleaner. Huh? Never heard of it? Well, yeah, it's really a pontoon boat cleaner, designed to clean and brighten the aluminum pontoons. I've used it because it's on the shelf in the garage, and tends to brighten the aluminum bits (and engines) on motorcycles. You know you're using it correctly if your hands start smoking like they're on fire, and it feels like a thousand ants are crawling on them.

Parts have continued to arrive from flooded Thailand, plus a few parts from the US and Canada. Since my tank side panels never had emblems on them, I had to test-fit some aftermarket items I bought. Not perfect replicas, but I'm pleased with them for the price. The emblems were taken off again, since the side panels will be sent away for re-plating in a few months.

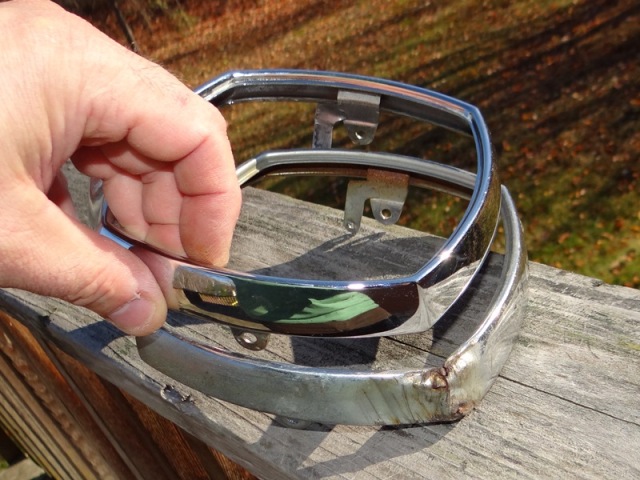
A NOS headlight bezel looked wonderful next to the dented and wrinkled original. I have about 20 parts on the way, with another 15 or so still needing to be ordered.
Image

Image

Image

My aluminum cleaner/brightener is really a pontoon cleaner:
Image

Posted: Sat Nov 05, 2011 3:26 pm
by Jetblackchemist
Nice posting, I'm glad to see you're getting parts coming in. That's always the exciting part getting boxes of shiny toys in the mail :) I've heard of people using that aluminum cleaner on their Air-stream travel trailers. I'm curious of what the results would be moistening a buff with it then using some aluminum polishing compound with it at the same time.
My Keyster carb kit had a wonkey shaped float bowl gasket, I had to extensively take an exacto knife to it. I'm not surprised you didn't get the float valve. From what I've experienced and heard the Keyster kits can be hit or miss, such as gasket issues, missing or wrong size jets etc. One little trick I use to get gas flowing into the carb faster, after it's been sitting or the petcock has been shut off, is un clamping the bowl til it's almost full of gas then clamping it back shut before it over flows, if anyone does this take care to not let the float drop down, or the float jet can drop out.

Posted: Sun Nov 27, 2011 10:09 pm
by Smithers
How is the progress on this winter project? Last I read you had a ton of parts in the mail. I know you can't wait until Christmas to open them. :)

Posted: Mon Nov 28, 2011 5:37 am
by ByTheLake
Smithers wrote:How is the progress on this winter project? Last I read you had a ton of parts in the mail. I know you can't wait until Christmas to open them. :)
Hello Smithers! You're correct ... when I get home and find new packages delivered, I rip them open like birthday presents. I'm still in the parts acquisition phase, and still have some expensive parts to get, like the exhaust, seat, rims and tires.

But I've not been idle, no sir! With my pending wrist surgery just 11 days away, I'm getting some little things done before my wrenching is placed on hold for a few months as I heal.

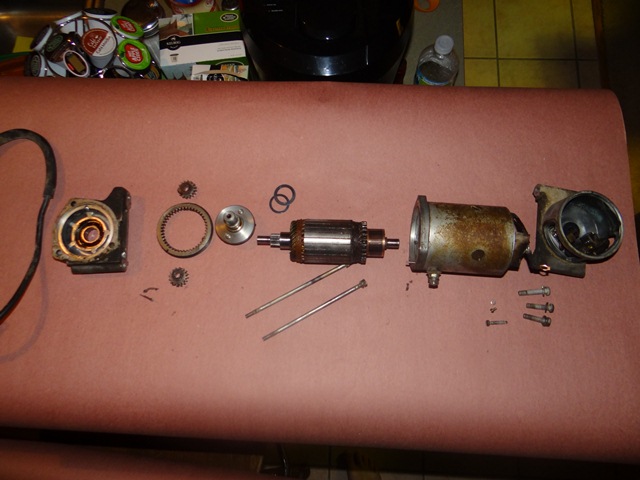
It's hard to make this exciting, but in the spirit of a full restoration, I cleaned and rebuilt the starter motor. You asked, so here's my update in painful detail:

Below is the starter disassembled and spread out on some paper on the kitchen counter (since my wife is at work and I have the day off, the kitchen counter is perfectly suitable).

Image

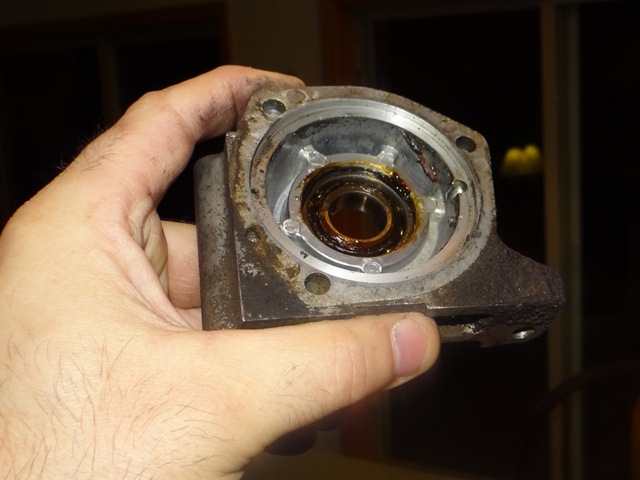
Below is a shot of the ball bearing, which appears to be adequately lubed, but that grease peeled away easily, having the consistency of licorice candy. Not good.

Image

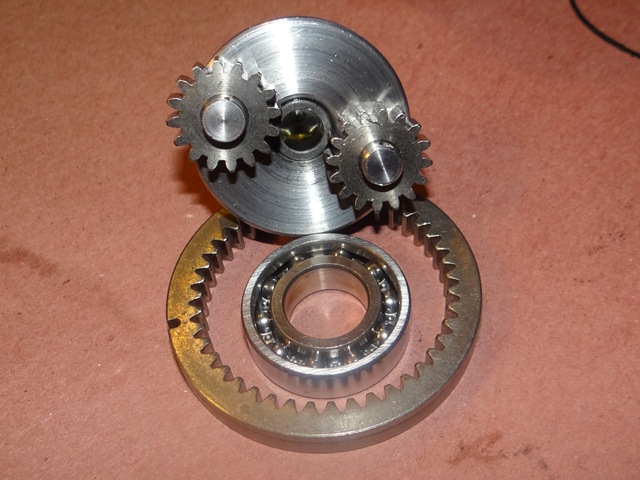
Here are the planetary gears and the ball bearing after soaking in mineral spirits to remove the old grease, plus a final blast in the ultrasonic cleaner for a dose of cleaning overkill.

Image

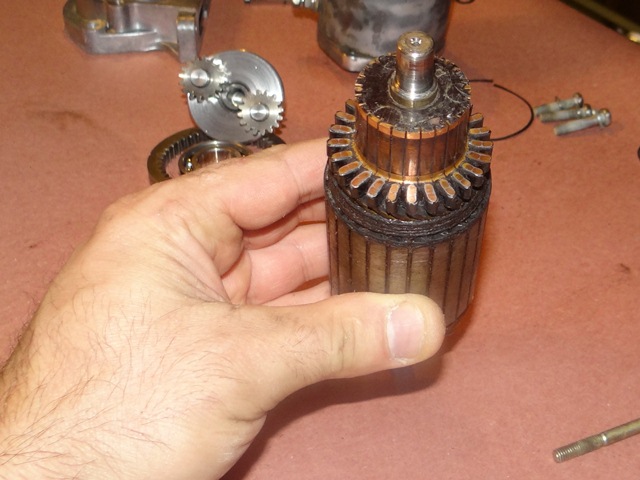
The commutator contacts on the armature are like a delicate copper flower. Ok, enough poetry ... the contacts looked to be in good shape, so I just cleaned them by hand. I didn't soak the armature in anything for fear that the lacquer insulation on the copper windings might come off.

Image

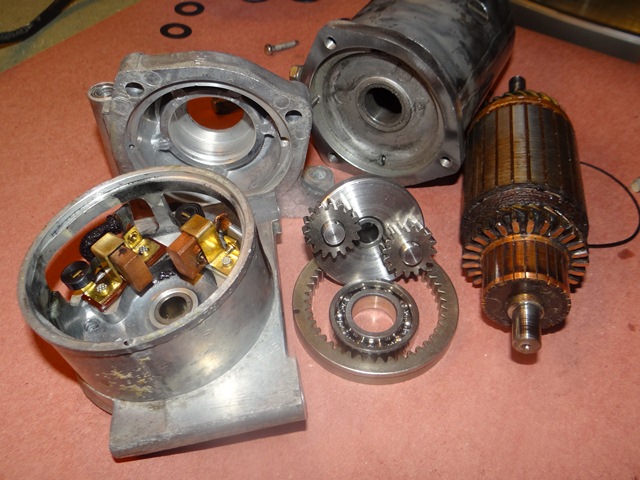
Below, the major parts are cleaned and ready for reassembly.

Image

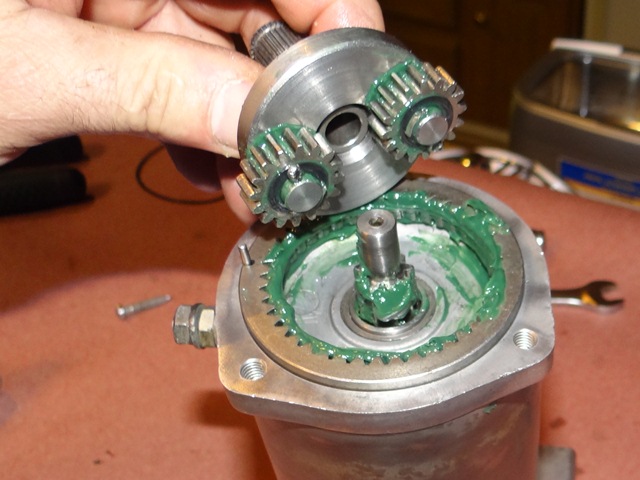
Below the planetary gears and ring gear are greased for reassembly.

Image

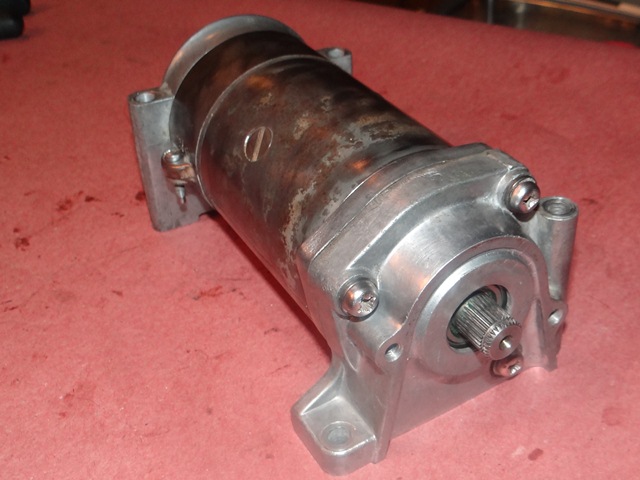
Below is the starter reassembled and ready for painting when the engine parts get painted later.

Image

After the starter was reassembled, I connected it to a battery with jumper cables and it pounced to life. It sounded pretty good, so I'm confident that my starter is ready for more years of service.

Posted: Mon Nov 28, 2011 8:27 am
by kartgreen
Nice job on the starter ! Great pics also . About the time I think of taking pictures on something I'm doing I'm already done or I go to get the camera and of course the battery needs recharging .
Just rebuilt the starter/ generator on my Yamaha gas engined golf cart . It has 4 brushes , 2 for the starter and 2 for the generator side , and about 6-7 years ago I swapped the brushes around . Well one set finally wore out so of to the golf cart parts place . They ask if I wanted a new rebuilt starter/generator for $640 and they just couldn't believe I said No just sell me the brushes for $10.00 ! About an hours time and the carts back in action .
My golf carts a 1988 which in golf cart years makes it an antique ! Maybe I'll go look for a forum for old golf carts .

Posted: Mon Nov 28, 2011 1:50 pm
by Smithers
Just rebuild these things and keep on rolling. I rebuilt my CB72 starter a while ago and it was easy. The bearings were completely shot and it went from squealing to seizing up eventually. 2 new bearings and brand new again. Same with these little guys. Just refinish the brushes or buy new ones and a good cleaning is all they need. Hah we don't even think about buying a rebuilt. I miss the days when people repaired everything.

Check out my threads on Keurig coffee and mytrusty ultrasonic cleaner. What setup are you using and what kind of cups are you using in your K machine?

Posted: Mon Nov 28, 2011 2:08 pm
by ByTheLake
Smithers wrote:Check out my threads on Keurig coffee and mytrusty ultrasonic cleaner. What setup are you using and what kind of cups are you using in your K machine?
You are observant indeed. I hadn't noticed that the coffee K-cups were in the background of that picture.

Posted: Mon Nov 28, 2011 5:28 pm
by ByTheLake
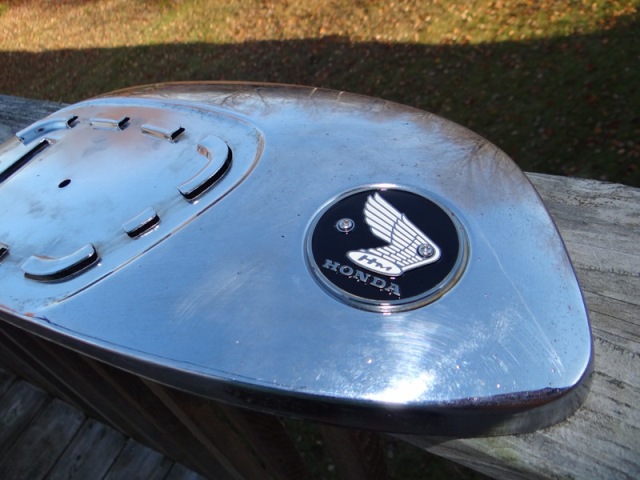
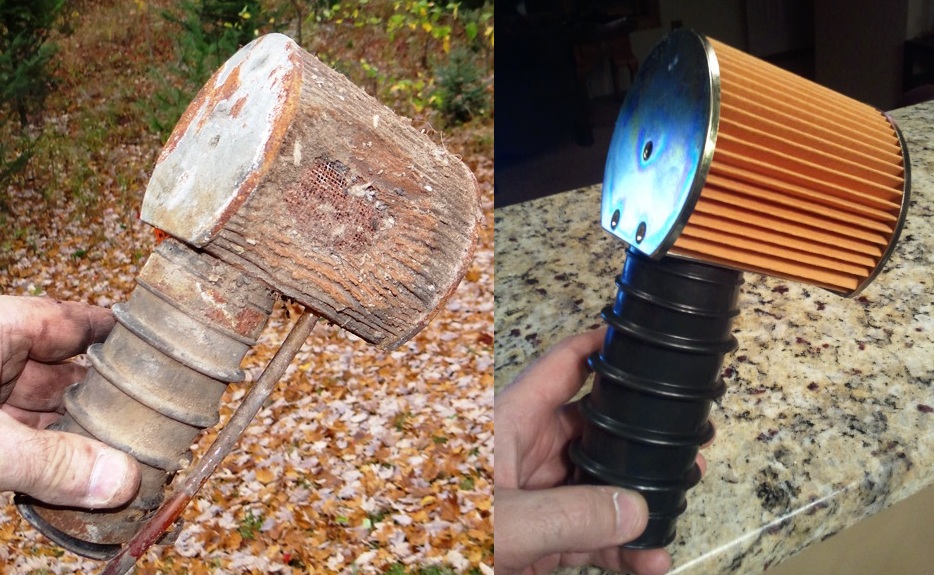
For grins, I thought I'd share a comparison of the original air cleaner that came out of my Benly and the replacement. I still laugh when I see the original, chewed by rodents and looking like a piece of firewood.

Image

Posted: Tue Nov 29, 2011 12:09 pm
by kartgreen
A while back I had a post that I reused my old metal filter housing by stripping the paper pleated material and using a sheet of Uni filter foam to reline the old filter . I've done 3 like that now for the price of $6.00 for the foam .

Posted: Tue Nov 29, 2011 2:28 pm
by ByTheLake
kartgreen wrote:A while back I had a post that I reused my old metal filter housing by stripping the paper pleated material and using a sheet of Uni filter foam to reline the old filter . I've done 3 like that now for the price of $6.00 for the foam .
I think I saw your earlier post on that, and actually planned to do something similar when I stumbled on the replacement filter for $19.99 (plus another $19.99 to ship it from Mars). I have such little spare time that this it was easily worth it for me to get the replacement part.

Posted: Tue Nov 29, 2011 5:47 pm
by 65ca95
ByThe Lake

Where'd ypou get the air filter?

Posted: Tue Nov 29, 2011 6:34 pm
by ByTheLake
65ca95 wrote:ByThe Lake

Where'd you get the air filter?
On eBay ... if you search for 'Honda ca95 filter', you'll see many options.

For example, I just saw one priced at $15.50 plus $12.00 shipping to the US. That one didn't include the rubber tube, but others are out there with a new tube, too.

Posted: Sat Dec 03, 2011 4:39 am
by DBowers
Great thread with tons of imformation! In doing one of these myself, I am searching for parts. Did I read somewhere that it was suggested to stay away from buying parts in Thailand? If so why? Also in taking my timing chain off the little springy clip that attaches the chains together flew away when I was taking it off. Anyone have one for sale or know where one might be found? I have yet to see any on the Bay.

Posted: Sat Dec 03, 2011 5:39 am
by ByTheLake
DBowers wrote:Great thread with tons of imformation! In doing one of these myself, I am searching for parts. Did I read somewhere that it was suggested to stay away from buying parts in Thailand? If so why? Also in taking my timing chain off the little springy clip that attaches the chains together flew away when I was taking it off. Anyone have one for sale or know where one might be found? I have yet to see any on the Bay.
I've done several Honda restorations, and after a quick review of my parts orders, I'd say about 80% of my parts have come from Thailand, via eBay. Sometimes it's the only option. I average about 45 parts orders per restoration. Honestly, after more than 100 parts received from Thailand, I have not had a single issue. On occasion, delivery can take a few weeks longer than forecast.

Regarding eBay, it's probably best to review the "feedback" rating for the seller, and read some of the reviews from past customers, positive and negative. Focus on sellers having thousands of reviews. Those are the established sellers.

Here's a link full of advice:
http://reviews.ebay.com/Ebay-Scams-and-how-to-avoid-them_W0QQugidZ10000000001636804

There are no guarantees, but if you're selective about the seller and do a little reading before buying, you should be ok.

Posted: Sat Dec 03, 2011 5:43 am
by ByTheLake
DBowers wrote:Also in taking my timing chain off the little springy clip that attaches the chains together flew away when I was taking it off. Anyone have one for sale or know where one might be found? I have yet to see any on the Bay.
Start by doing an eBay search on "springy clip" ...

Sorry, couldn't resist. Here's an option:

Here's one available for $1.77, part number 6:

http://www.atvhondaparts.com/fiche_section_detail.asp?section=118984&category=MOTORCYCLES&make=HONDA&year=1966&fveh=2850

The CA95 parts manual lists the part number as 14411-216-000.

Cheers.