|
|||||||
| The Honda CA95 / Benly 150 Restoration The little brother to the CA160 in our family of Hondas |
 |
| Thread Tools |
|
#91
|
|||
|
|||
|
I got a kick out of the value being 1/3 the investment! These projects are awesome. You know in your heart this bike will increase in value as the years go by- possibly not in our lifetimes! Japan is crazy about their old exported bikes, paying top dollar for great examples. Tell the wife this... hmmm, she'll feel better... or not.
For real, can't wait to see the finished product! Show room new. 
|
|
#92
 07-12-2012, 01:12 PM
|
||||
|
||||
|
Quote:
|
|
#93
07-14-2012, 01:14 PM
|
||||
|
||||
|
Today, 274 days after I began disassembling the ’65 Honda, I finally started to reassemble the motorbike. Since the wide white wall tires are still on back order, I can only go so far, but I put in about 4 hours on the project today. I’ll do some wiring work tomorrow now that the wiring harness is in, but I’m moving at a slow pace to make sure I get in my naps.
 Before the logo police jump all over me, I thought I'd explain the picture below. I never liked the emptiness of the side covers, so from the beginning of this project, I've hunted for just the right adornment. With all the reading I did about Honda's progress in the 1960s, I noticed that its first production car, the S500 roadster, had an interesting Honda script logo on its flanks. I hunted down replica logos and bought a pair for my Benly. Honda never used this logo on its motorcycles, but it fits the time period and style of the Benly pretty well. In the picture below, the pieces are just resting on the side cover. I'll wait until the bike is finished so I can use the laser level to put these pieces on. 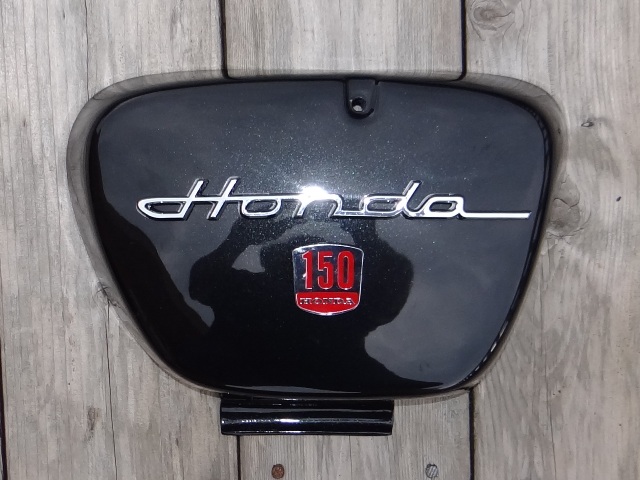 While working on the project, I noticed that one of the pliers I grabbed was an antique that used to belong to my great uncle Mickey. It's a pliers from an old Ford Model A tool kit. How cool is that? 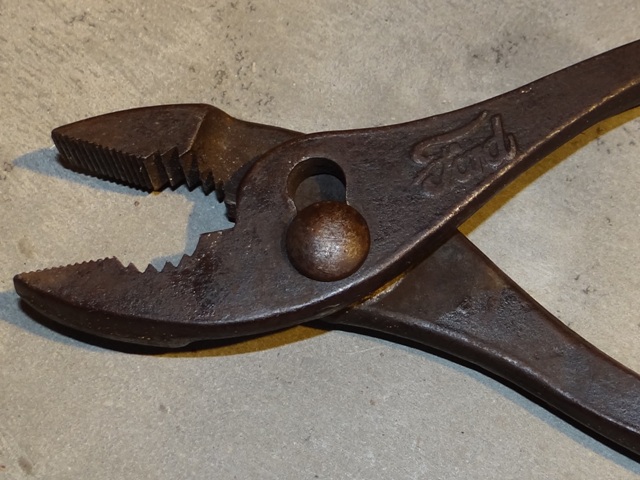 Otherwise, the early assembly is like what countless others have posted here before. Below I have the front fork and suspension mounted. I pulled the remaining weird Honda grease fittings, tapped some threads, and installed new metric grease fittings that will actually fit my grease gun. 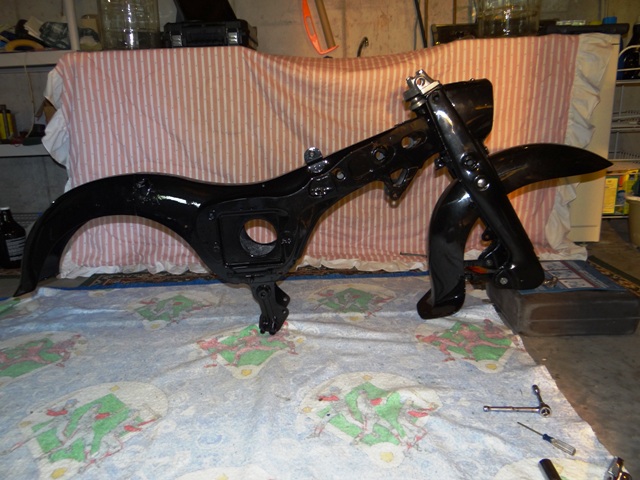 Below, old wiring meets new wiring. 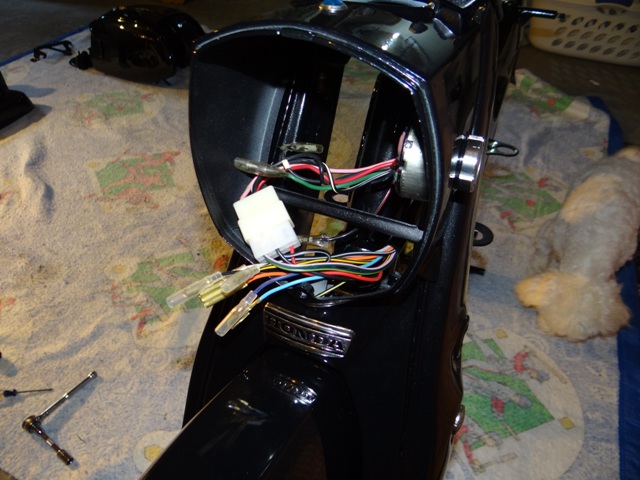 Below, the seat and fuel tank are just resting on the frame for the picture. 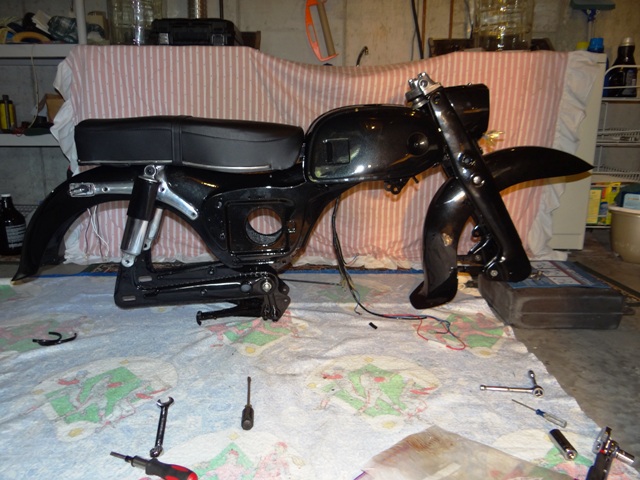 Tomorrow I'll work on routing the wiring and hooking up the rectifier, starter relay, and turn signal flasher. Cheers. Last edited by ByTheLake; 07-14-2012 at 01:37 PM.
|
|
#94
07-14-2012, 03:53 PM
|
||||
|
||||
|
Looking great!

|
|
#95
07-15-2012, 04:34 AM
|
||||
|
||||
|
ARGH! A Ford tool on a HONDA! Why aren't you reassembling just using your Honda tool kit?
Just kidding BTL but imagine doing the whole job with just the factory tool kit.... The progress is great. Just curious did you buy a new harness or find something aftermarket? I am looking to start to reproduce these myself is why I ask... Keep on truckin with it....
|
|
#96
07-15-2012, 04:44 AM
|
||||
|
||||
|
Quote:
I'd have simply added the additional wiring as needed, but since the original harness was chewed up by mice that once nested inside the frame, I needed to replace it anyway.
|
|
#97
07-15-2012, 10:21 AM
|
||||
|
||||
|
As planned, I spent a few hours on the Benly project today. I'll be out of town until August 4, so progress will be delayed a bit.
I installed the handlebars and related wiring, the center stand, the clutch and throttle cables, and countless little items. Below, Enzo, my 18-month old Maltese, inspects the wiring. He's always around but rarely helpful. 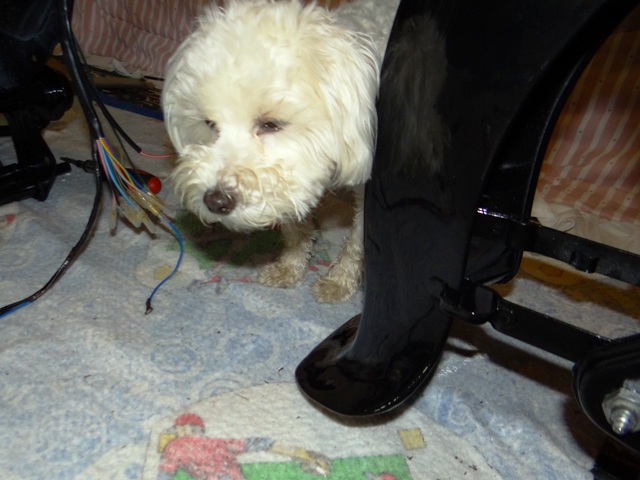 In yet another move that would give a motorcycle contest judge fits of rage, I decided to plug those two holes in the back of the front fender with threaded brass stud things. I believe these holes were intended for a mudflap or something, but every CA95 I've seen simply has these holes empty. Maybe the mudflaps were a dealer option, not sure. Regardless, I liked the way the brass contrasted with the black paint. 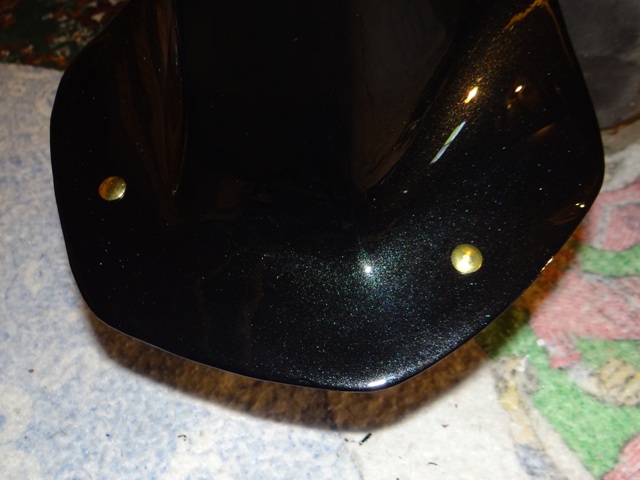 The original tapered screws that held the rear fender braces in place were in rough shape, heavily corroded and looking like the previous owner chewed on them. I found some nice stainless steel metric hex socket screws in just the right length at the local hardware store, and they look pretty good to me. 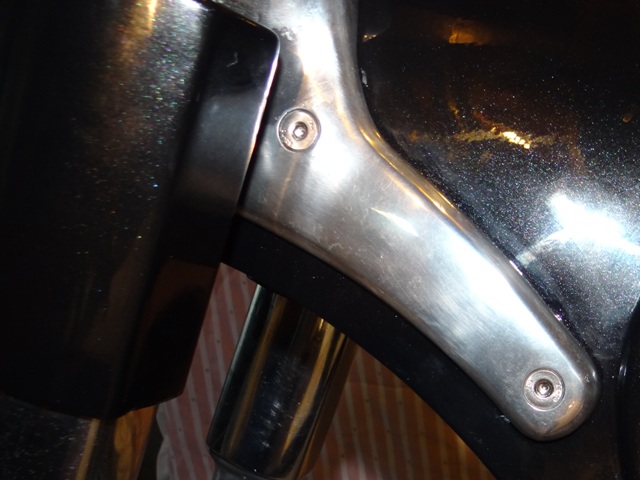 Below, the speedometer is mounted, since 1983 stuck on 6149 miles. I sure hope to see those numbers climb this year. 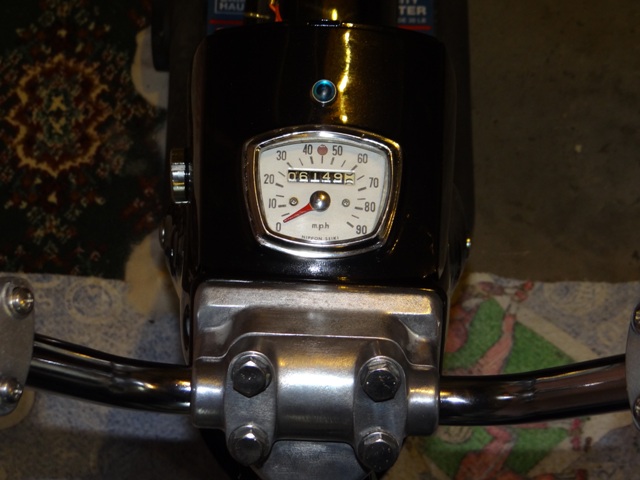
|
|
#98
07-15-2012, 10:36 AM
|
|||
|
|||
|
Extremely nice job on the bike. The holes on the bottom of the fender held an inner plastic ...mudguard. The mud guards were destroyed when the bottom flange hit the ground and ended up in the position your lower fender flare is now. Only last year, when I was gifted a new, original, CA95 fender, did I know what the original formed lower fender looked like. Since only a handfull of folks know this tid bit, no will know the better. Nice job. BTW, The Honda emblem on the side cover is boss.
|
|
#99
07-15-2012, 06:11 PM
|
|||
|
|||
|
I thought of putting one of the large block letter badges across the side cover that has the bolt holes on it; but those selling them never list the post measurement.
As an owner that makes his own personalisations; I can say that it's those little touches that puts your personality into the bike that makes it yours, even if you don't have a long history with the bike. My plan for my little fender holes is to use some old glass license plate reflectors in them. I'm going to lace my rims here soon, I have about 1/4 inch wobble in the back rim I'm not thrilled with. Glad to see it coming back together nicely; I don't think you'll have a problem with it starting, this motor is proving to be as tough and forgiving as a Sherman tank. Hopefully a certain something arrives soon for you.
|
|
#100
08-25-2012, 04:20 PM
|
||||
|
||||
|
She runs!
Today I wrapped up the electrical work. The C95 wiring harness did the job, providing all the turn signal connections I needed. The maker of the aftermarket wiring harness took some liberties with the colors on the harness, but I traced the wires from the key switch and got everything squared away. The 6-volt turn signals blink nicely, the neutral lamp glows, and the headlight and tail light work. Since mice had chewed most of the wiring that originally came from the ignition coil, I had to solder on new leads, but the coil produced a good spark at both plugs. Although I still had some work to do, I was at a point today where I could put a few handfuls of fuel in the tank to test the engine. I added fuel, set the petcock to reserve, set the choke, turned the key, then pressed the starter button. The engine cranked for a few seconds, sputtered a few times, then roared to life. It was 93 degrees here today, so I quickly backed the choke down. The engine sounded great, a tad loud since the muffler didn't yet have the baffles installed. I'll do that tomorrow. I then noticed that oil was leaking from below the engine. I turned off the engine. A nut at the bottom of the engine case was the source, leaking a surprising amount of oil. I replaced the standard nut with an acorn nut and a green o-ring, and that seemed to do the trick. I started the engine again, this time it pounded to life instantly. I ran it for roughly 2 minutes, then noticed fuel leaking. I turned it off again. Fuel was dripping from the rebuilt petcock, and again from the carburetor's overflow tube. Rats, more work. I drained the fuel from the tank and carb and parked the Benly for the night. I still have some work to do before I take it on the road for the first time, but today was a milestone. 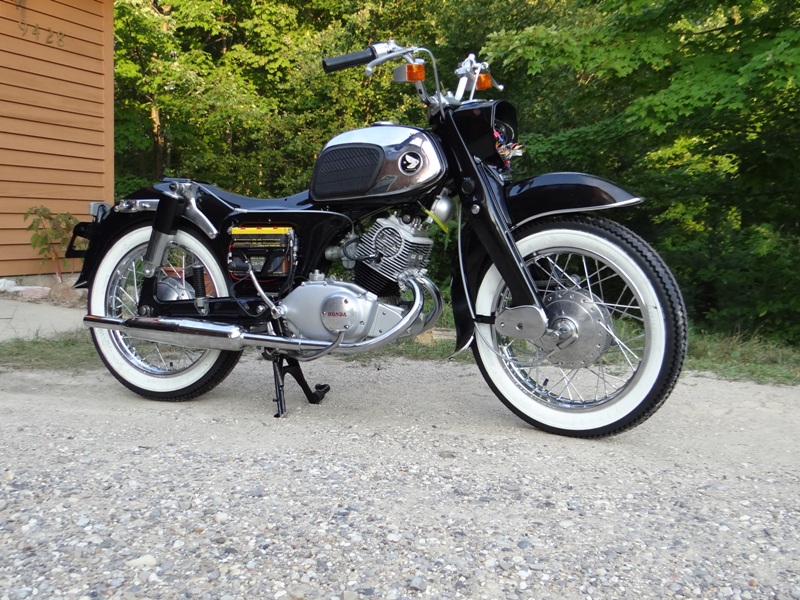
|
|
#101
08-25-2012, 08:05 PM
|
||||
|
||||
|
Try letting the petcock sit overnight in the on position with fuel in it and a rag underneath it. Sometimes the gaskets need to swell up a bit before it will seal. Otherwise, you could be having problems with the mating surface on your tank. I've been having the opposite problem with mine. The rubber parts have swelled up too much and were not letting enough fuel out of the tank for the bike. Some material was removed with a drill bit and it seems to be working.
The carb overflow is a bit of a problem for me as well. The float seems to be sticking a little bit. Bike looks GREAT by the way.
|
|
#102
08-26-2012, 02:55 AM
|
||||
|
||||
|
Quote:
|
|
#103
08-26-2012, 04:38 AM
|
|||
|
|||
|
Done.
Last edited by Jetblackchemist; 11-09-2012 at 10:37 PM.
|
|
#104
08-26-2012, 05:25 AM
|
||||
|
||||
|
Excellent progress!

|
|
#105
08-26-2012, 06:01 AM
|
||||
|
||||
|
I worked on the petcock today. I replaced the neoprene washers with green o-rings, just to see if it made a difference. Placed over a 2x4 for testing, there was not a single leak around the screws - but where the petcock body meets the fuel tank there was a Niagara-style leak, even with the screws snugged up pretty good. The tank's mating surface was smooth as a baby's bottom, so I looked carefully at the petcock body and noticed that it was warped.
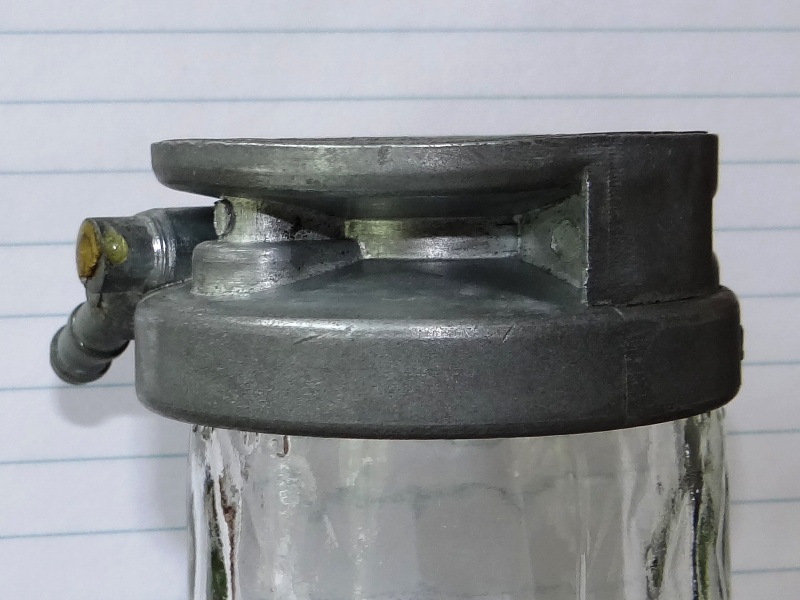 You can see the warping at the top of the petcock body. Anyway, I've decided to forego this needlessly complex petcock and order an adapter kit along with a 3/8" chrome Harley-style petcock. The bike isn't going in a museum nor will it be entered in shows - I'm building it for me, so the updated petcock will be fine. I'll reassembly the original petcock and set it in the archive box of original parts.
|


