|
|||||||
| The Honda CA95 / Benly 150 Restoration The little brother to the CA160 in our family of Hondas |
 |
| Thread Tools |
|
#1
|
||||
|
||||
|
On September 30 I bought a really rough, 1965 CA95 as my next restoration project. The bike has 6100 miles on the clock and was last run in 1983 ... perfect! It's no fun restoring something that runs already.
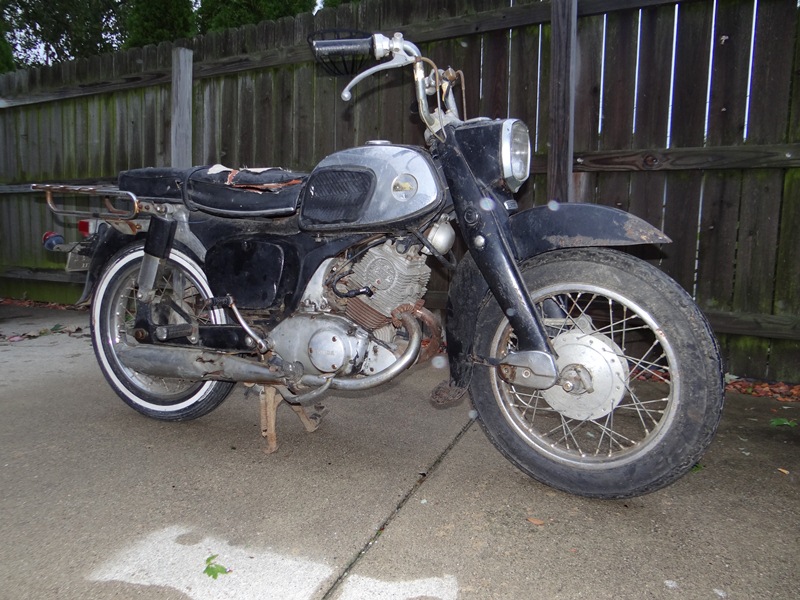 The cheesy aftermarket rear luggage rack will not be included in the restoration. The US-spec CA95 wasn’t built with turn signals, but the general export C95 was, so I’ve hunted down the proper turn signal switch and lights to ensure that I'll have working turn signals on the final product. On October 15 I finally got an opportunity to start the disassembly of the Benly. Since this bike was stored in a shed for nearly 3 decades without being used, I was prepared for surprises and challenges. I got out the tools, reviewed my handy list of swear words, set the box of Band Aids within reach, then started to work. I started by draining out all the engine oil. There was exactly one half cottage cheese container of oil in the engine, which is the universal measurement for “not enough oil”. It had the consistency of melted mozzarella cheese, another bad sign. Below are some pictures of the progress so far. I'll post updates over the next few months. I found the fuel inlet tube rolling around in the fuel tank. That hints that the petcock gasket is no longer pliable, so I've ordered a new one. 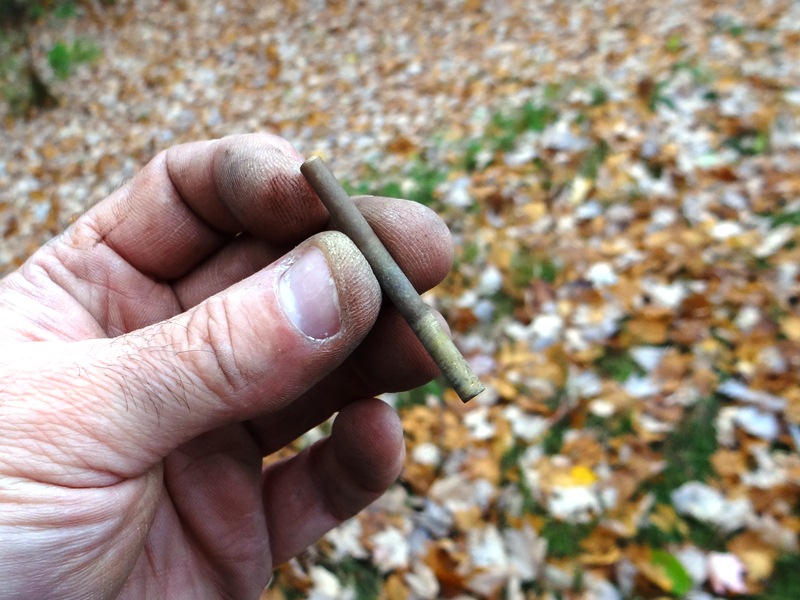 Exhaust flanges removed without incident ... that's good. 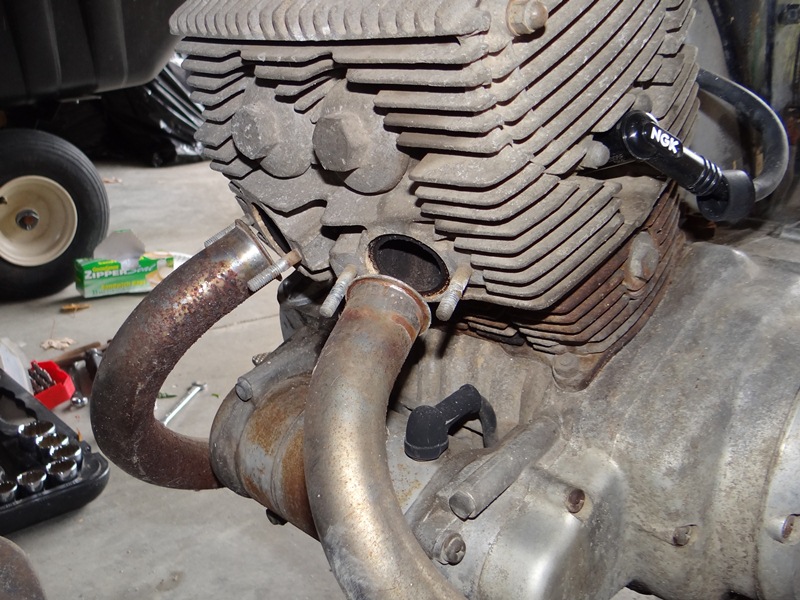 Below, I found a mouse nest inside the frame, behind the carburetor ... where much of the wiring resides. Oh oh. 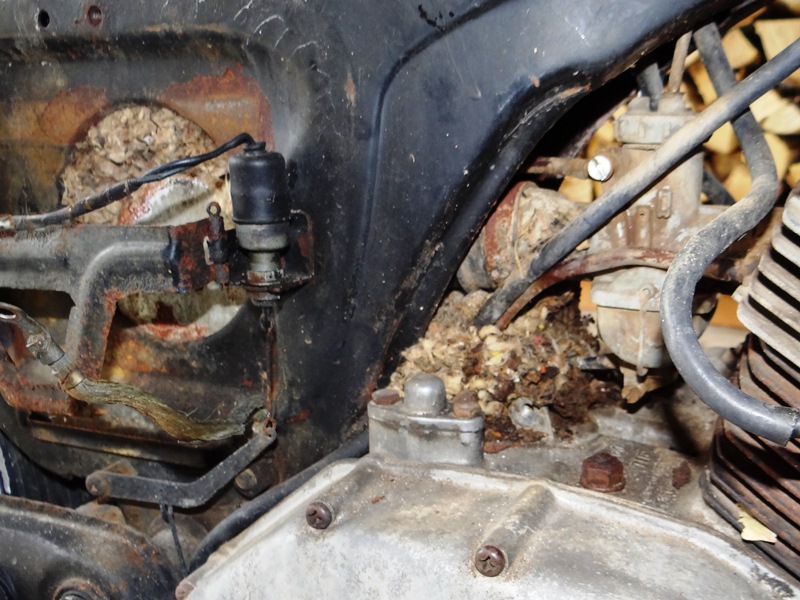 It appears that the mice enjoyed the air cleaner, which oddly looks like a piece of firewood at this point. 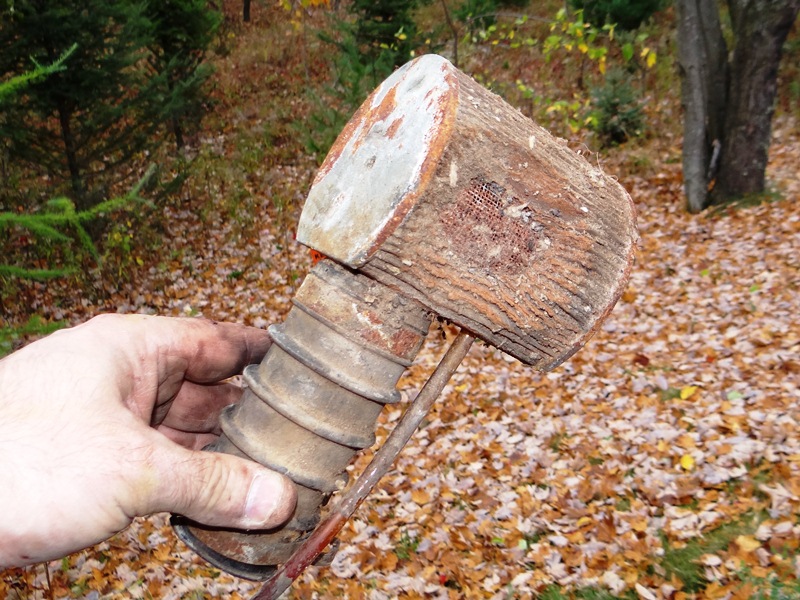 Below, my Benly is now a rolling chassis.  The engine is free. 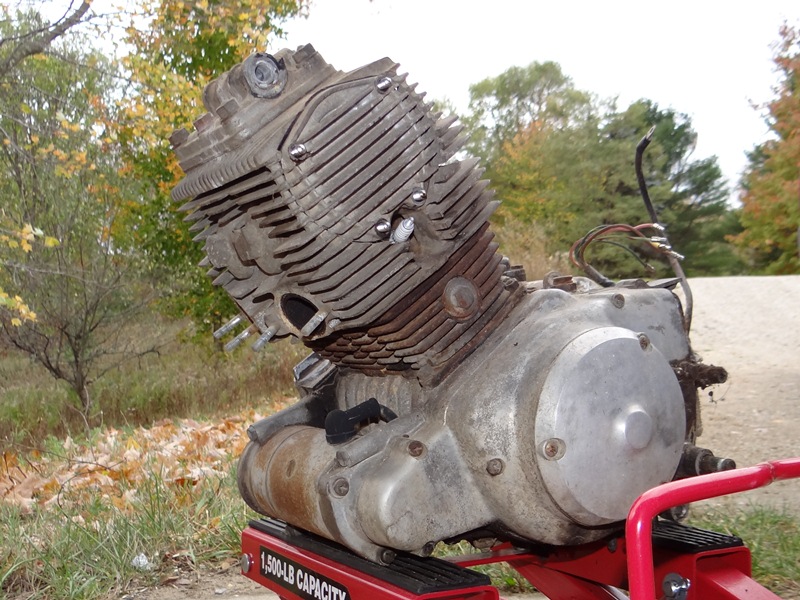 Below, the mice did some wiring work, so I'll carefully inspect the harness when it's off the bike to decide whether to fix or replace completely. Replacement harnesses are cheap. 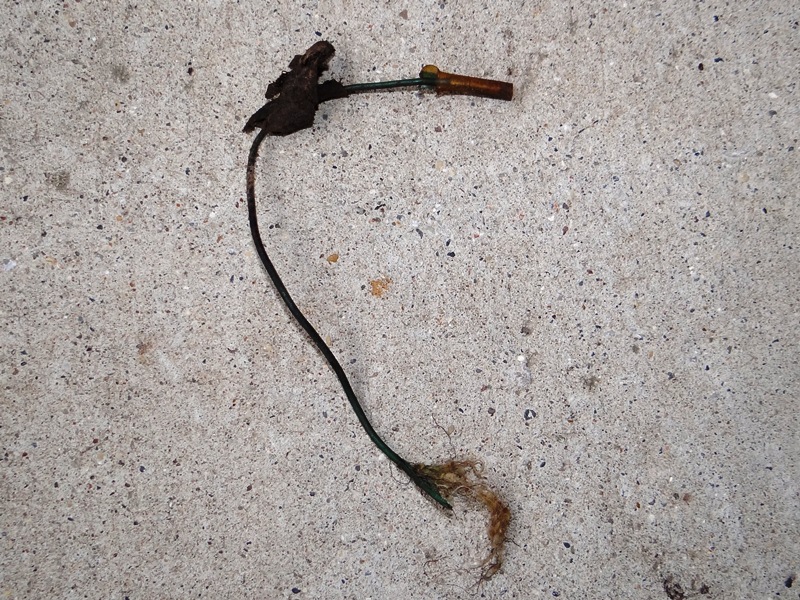 Below is my first glance inside the engine ... the camshaft and cams looked good. Not a score or scuff anywhere. 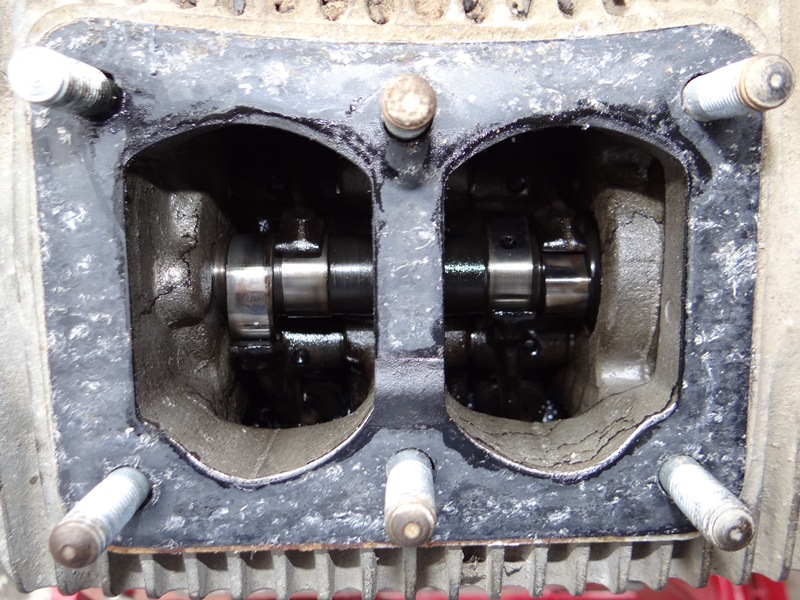 Below, the head has some carbon build-up, which will be cleaned when I pull the valves. 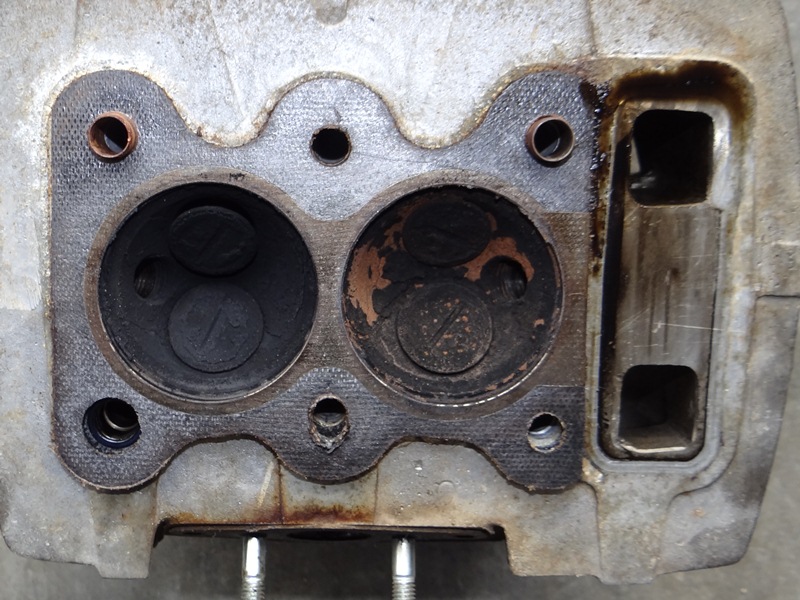 The picture below doesn't show the cylinder condition very well, but the cylinders looked great. Perfectly smooth, no scoring to be seen anywhere. I'll take some micrometer measurements later to understand what I have. 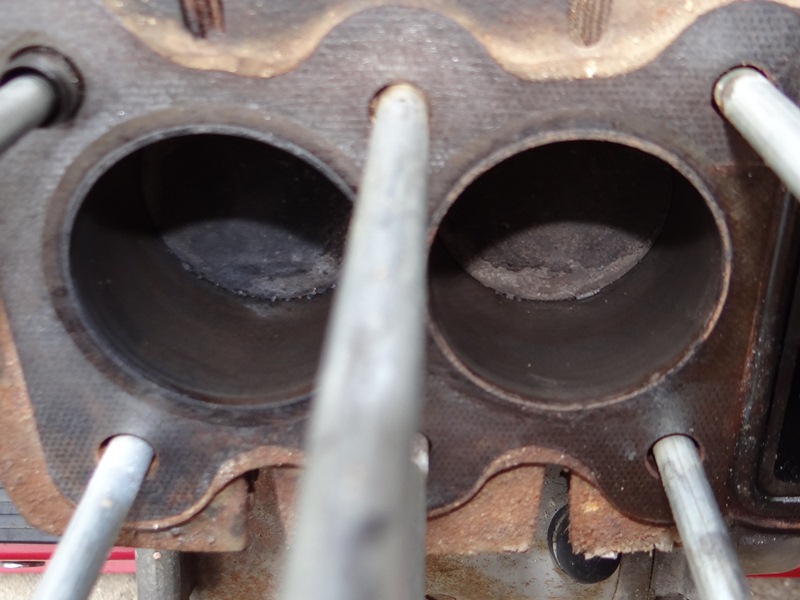 The carburetor has some gasoline residue/varnish, but no oxidation, so I'm happy. 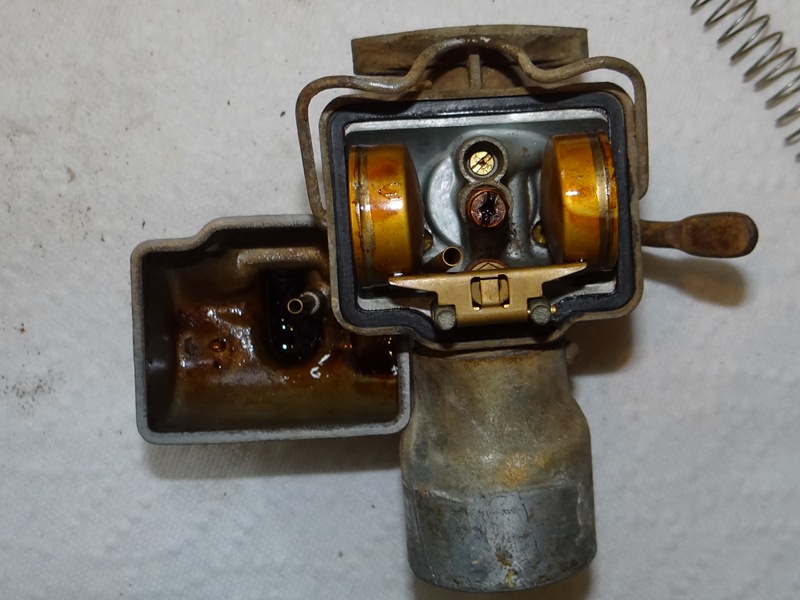 Have you ever seen a rear sprocket this worn? I realize it's aluminum, but I'm assuming that the previous owners had some religious issue preventing them from lubricating and adjusting the chain. 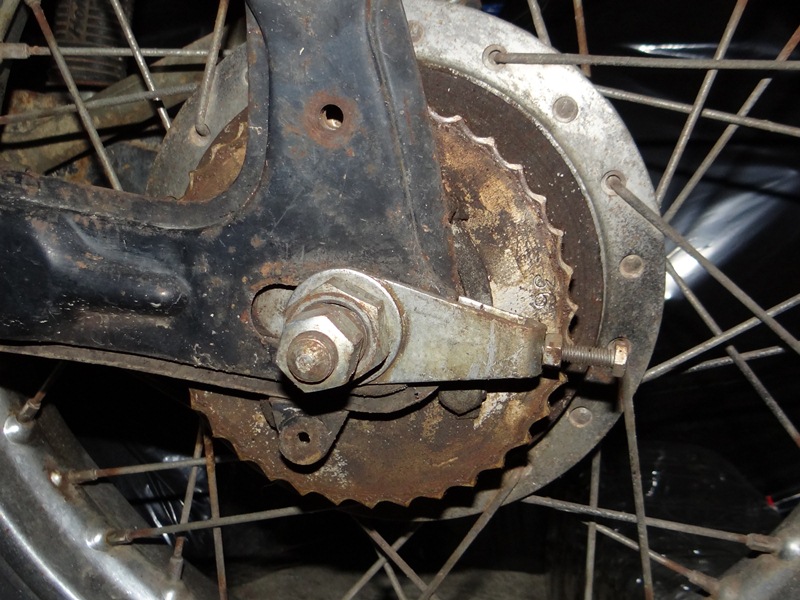
Last edited by ByTheLake; 11-04-2011 at 02:50 AM. 
|
|
#2
 10-19-2011, 04:41 AM
|
|||
|
|||
|
Hey ! Welcome to the forum ! Saw your post on the Honda Twin forum and reccommended you check out this site . Check out some of the builds and various post by the members . Everyone is helpful and willing to share what the've learned as they encounter problems during their builds .
Hope you enjoy this forum , no flaming going on here unlike most other forums . Keep us posted on your build .
|
|
#3
10-19-2011, 05:26 AM
|
||||
|
||||
|
Quote:
|
|
#4
10-19-2011, 02:10 PM
|
||||
|
||||
|
Welcome aboard! Holy smokes!! Look at that sprocket. That engine must have some porting done to make all that power. You are a very lucky man that the valves were shut in the head to keep the cylinders shut tight and rust free. It's in great shape!
|
|
#6
10-20-2011, 01:32 AM
|
||||
|
||||
|
Quote:
|
|
#7
10-23-2011, 02:29 PM
|
||||
|
||||
|
I completed the tear-down of the 1965 Honda Benly Touring today, reducing the motorcycle to a rusty steel frame. I power washed all the body parts, eating away at the decades-old mud and crud under the fenders and inside the frame cavity. I was pleased to find the wiring harness to be mostly complete, minus the two wires that fell victim to mouse teeth. I’ll repair and re-solder those connections later.
The speedometer appeared to be in pretty rough shape. There was lots of aluminum oxide corrosion on the face plate, so I feared that I’d need to get a reproduction plate decal. I disassembled the speedometer and found the worm drive mechanism to be frozen. Perhaps that’s why the original speedometer cable was broken, and it certainly would have broke any new cable. After some lubrication, I was able to get the gears to move freely. Fortunately, the paint on the face plate was not pitted, and the corrosion cleaned off rather easily. Over the decades, the speedometer needle had faded to a pale orange, so I used a red Sharpie Paint Marker to give the needle back its color. I’m pleased with the results. The project will slow down a bit now as I turn my attention to rebuilding the engine and transmission. Over the Winter months, I’ll gather a few parts each week until I have what I need. In the Spring, the frame and most black parts will be sand blasted, primed and painted. 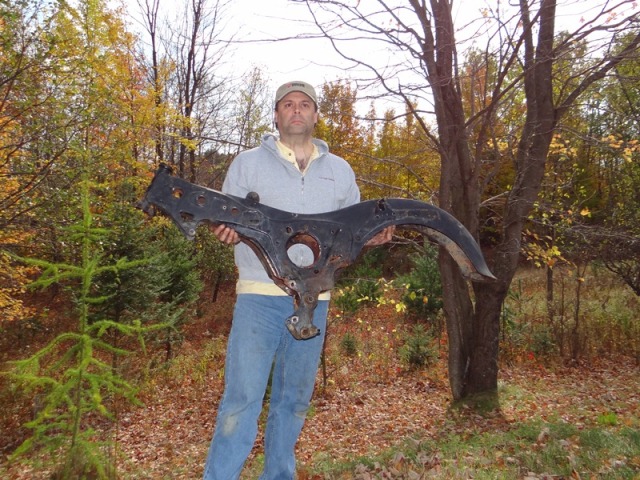 Below is the ancient selenium rectifier. Since selenium degrades over time, I always replace these with new silicon rectifiers for an efficiency boost and added reliability.  The project table is fully loaded, and all small parts are labelled in zip-lock bags. 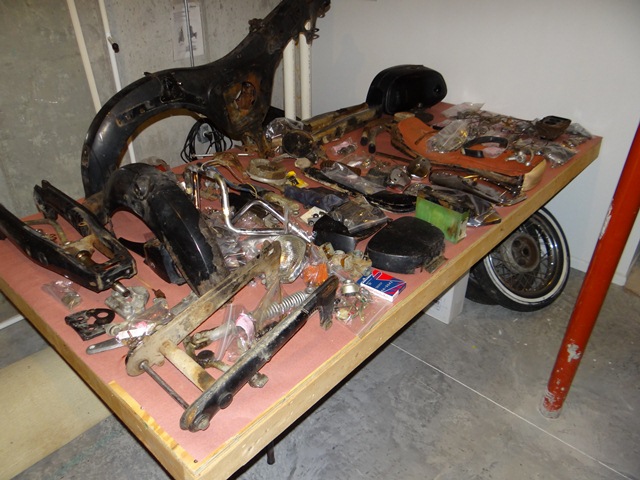 Speedometer before cleaning and lubrication 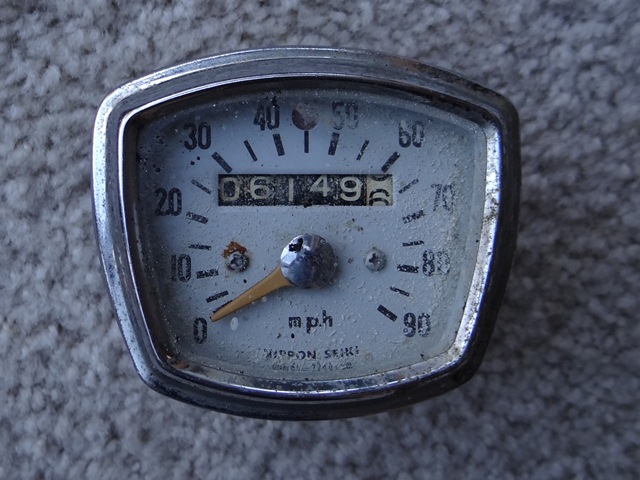 The worm drive was frozen until I cleaned and lubricated the mechanism.  Aluminum oxide accumulation on the face plate. 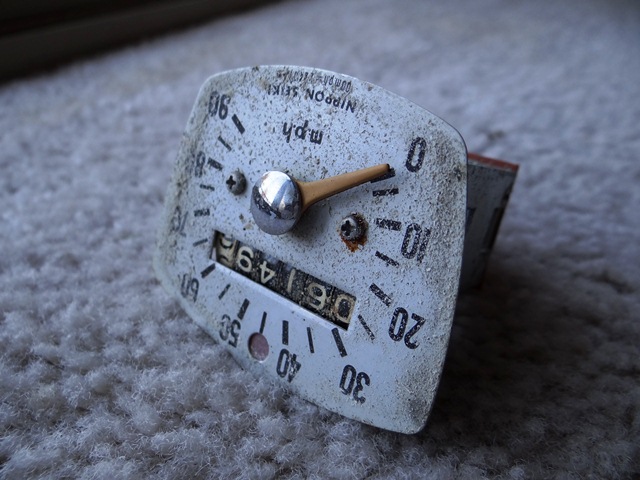 A Sharpie Oil-based Paint marker restores the red color to the needle. 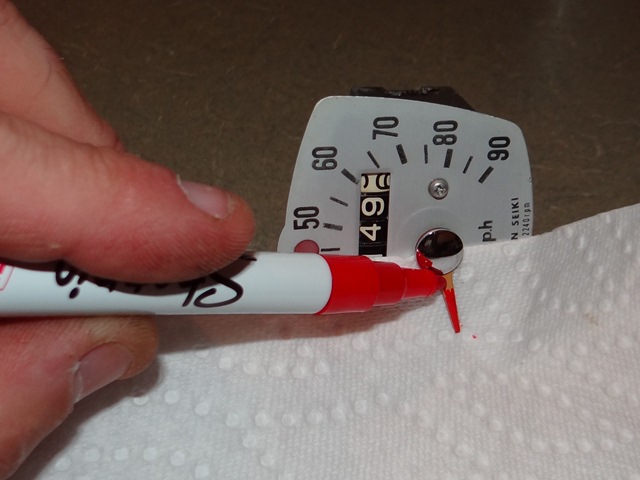 Not perfect, but much nicer now, and the mechanism works. 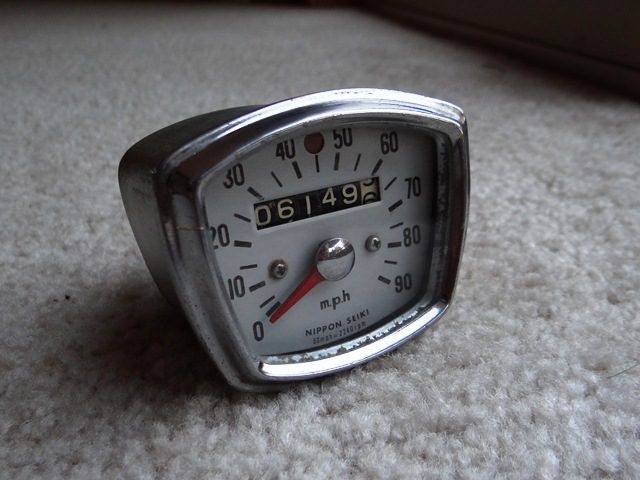
|
|
#8
10-23-2011, 04:28 PM
|
|||
|
|||
|
Great project! I have some cleaning suggestions from several of the same rebuilds. I have 3 items that helped make my restorations easy.
Ultrasonic cleaner. About $150 for a 2 or 3 liter unit with a heater. This the latest thing I found to clean nuts, bolts, carbs, wiring harness...even the speedometer. Just a 1/2 pint of alkaline cleaner and let the machine do the rest. It does a terrific job without solvents. Vibratory cleaner. About $75.00 for a small unit. This will remove rust from small parts and nuts & bolts using the green diamond shaped abrasive. Buffing motor & wheel. About $100.00 This is my secret weapon. Using green & gold stick rouge you cam make steel and aluminum shine like chrome. A little clear coat protects your work. Good luck with your build. Lots of great advice here.
|
|
#9
10-23-2011, 04:54 PM
|
||||
|
||||
|
Quote:
Given the cool Northern Michigan temps, i won't be painting the parts until the Spring, so I have plenty of time to prepare the rest of the parts. Last edited by ByTheLake; 10-24-2011 at 11:17 AM.
|
|
#11
10-27-2011, 09:26 AM
|
||||
|
||||
|
After some delays yesterday, I finally split the engine case on the '65 Benly today. I was pleased with what I saw. The engine crankshaft bearings looked great, as did the transmission gears and roller bearings. The shaft splines looked perfect. The transmission dog clutches were completely square, not rounded from use or abuse, so I expect this motorcycle to shift and hold each gear nicely.
I did have a bit of a scare when I pulled the oil drain plug. I had drained oil through the side of the engine earlier when I couldn't get this plug to come off. After heating the lower engine case with a torch, I was finally able to get the plug out, and the magnetic tip was covered with oily-metallic residue. I worried that this might hint at some engine damage, but when I wiped away the metallic mess, it felt smooth to my fingers. I couldn't feel any particles at all. Therefore, I'm assuming that this was an accumulation of minuscule pieces of iron from the cylinders, perhaps just normal wear. I'll take some measurements of the cylinders and pistons later to confirm that. So, the engine and transmission look great. I'll coat the parts with WD-40 before storing them in zip lock bags until I reassemble the engine in the Spring. It's too cold here in Northern Michigan to do any painting this year. 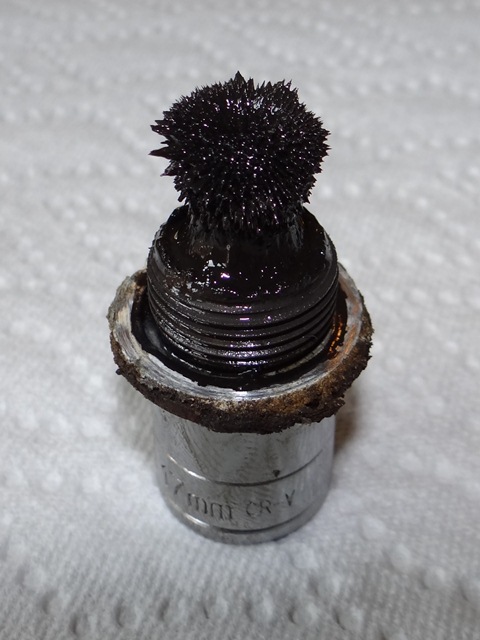 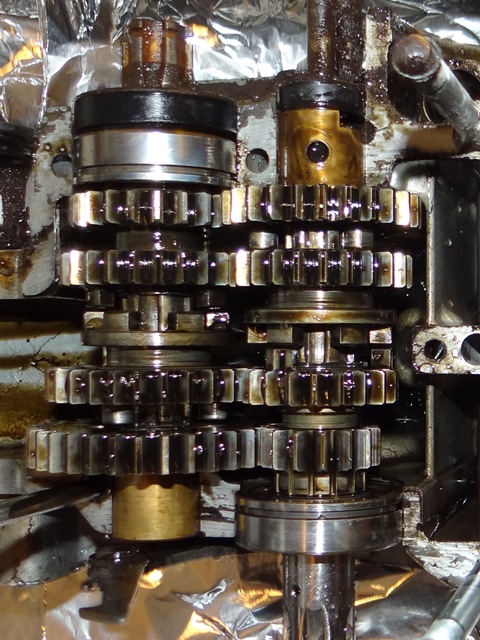 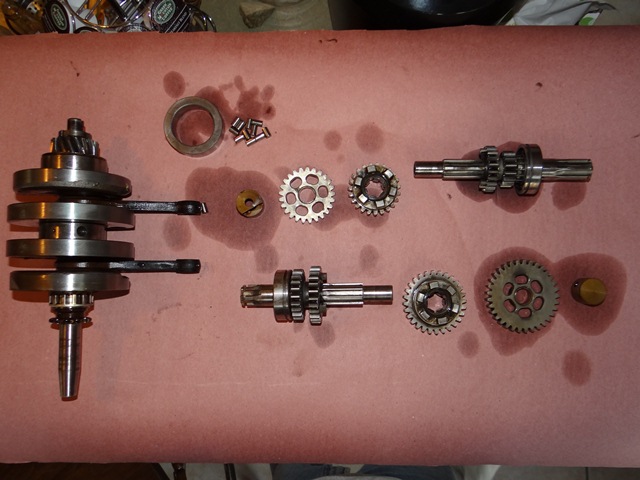
|
|
#14
10-28-2011, 12:26 PM
|
||||
|
||||
|
Yesterday I disassembled the CA95 engine head, and was very pleased with what I saw. The camshaft and rocker arms looked perfect. The valves cleaned up quite nicely, with no visible wear. I haven't cleaned up the head yet, so I haven't inspected the valve seats.
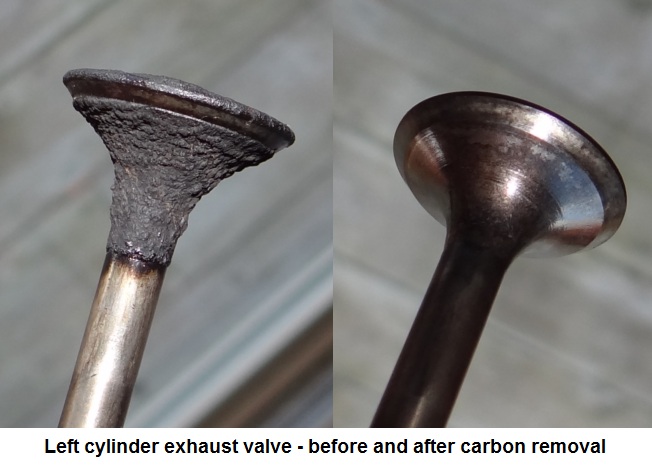 Below, the right cylinder valves after cleaning, compared with the left cylinder valves that had not yet been cleaned. 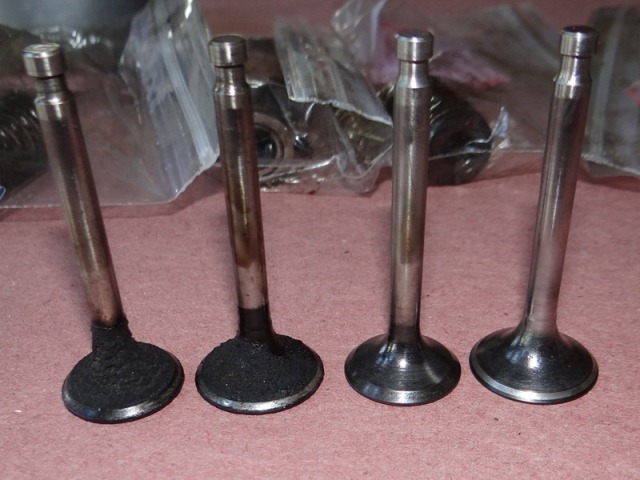
|


